 Graylog: Alerting
How to send Graylog alerts by email, Slack, or Mattermost
👋 Welcome to Stackhero documentation
Stackhero offers a fully managed Graylog cloud solution designed for speed and simplicity. You can:
- Count on an unlimited, dedicated SMTP email server included with your service.
- Apply updates easily with a single click, with no manual intervention required.
- Use a custom domain name secured by HTTPS (for example, https://logs.your-company.com), providing your team with secure, direct access.
- Benefit from strong performance and security on a private, dedicated infrastructure with no shared resources or noisy neighbours.
Focus on your data, not your tools: you can get started with Stackhero's Graylog cloud hosting solution in just a few minutes.
Graylog enables you to respond proactively to specific conditions by sending alerts through notifications. These notifications can be delivered via email, Slack, Mattermost, or an HTTP webhook.
For more information about alerts, you can consult the official documentation.
Configuring email notifications
Every Graylog instance provided by Stackhero comes with a built-in email server, allowing you to send unlimited emails directly from your instance at no extra cost.
To set up an email notification, you can follow these steps:
-
Access your Graylog service, go to
Alerts>Notifications, and click theGet started!button or selectCreate notification. -
Enter a title for your notification and select
Email NotificationunderNotification type. -
In the
Senderfield, enternoreply@<yourGraylogDomain>. Make sure to replace<yourGraylogDomain>with your actual Graylog domain name, which is usually in the format<XXXXXX>.stackhero-network.com.Important: Be sure to use your Graylog domain to avoid errors when sending emails.
-
Enter the email address where you want to receive alerts in the
Email recipientfield.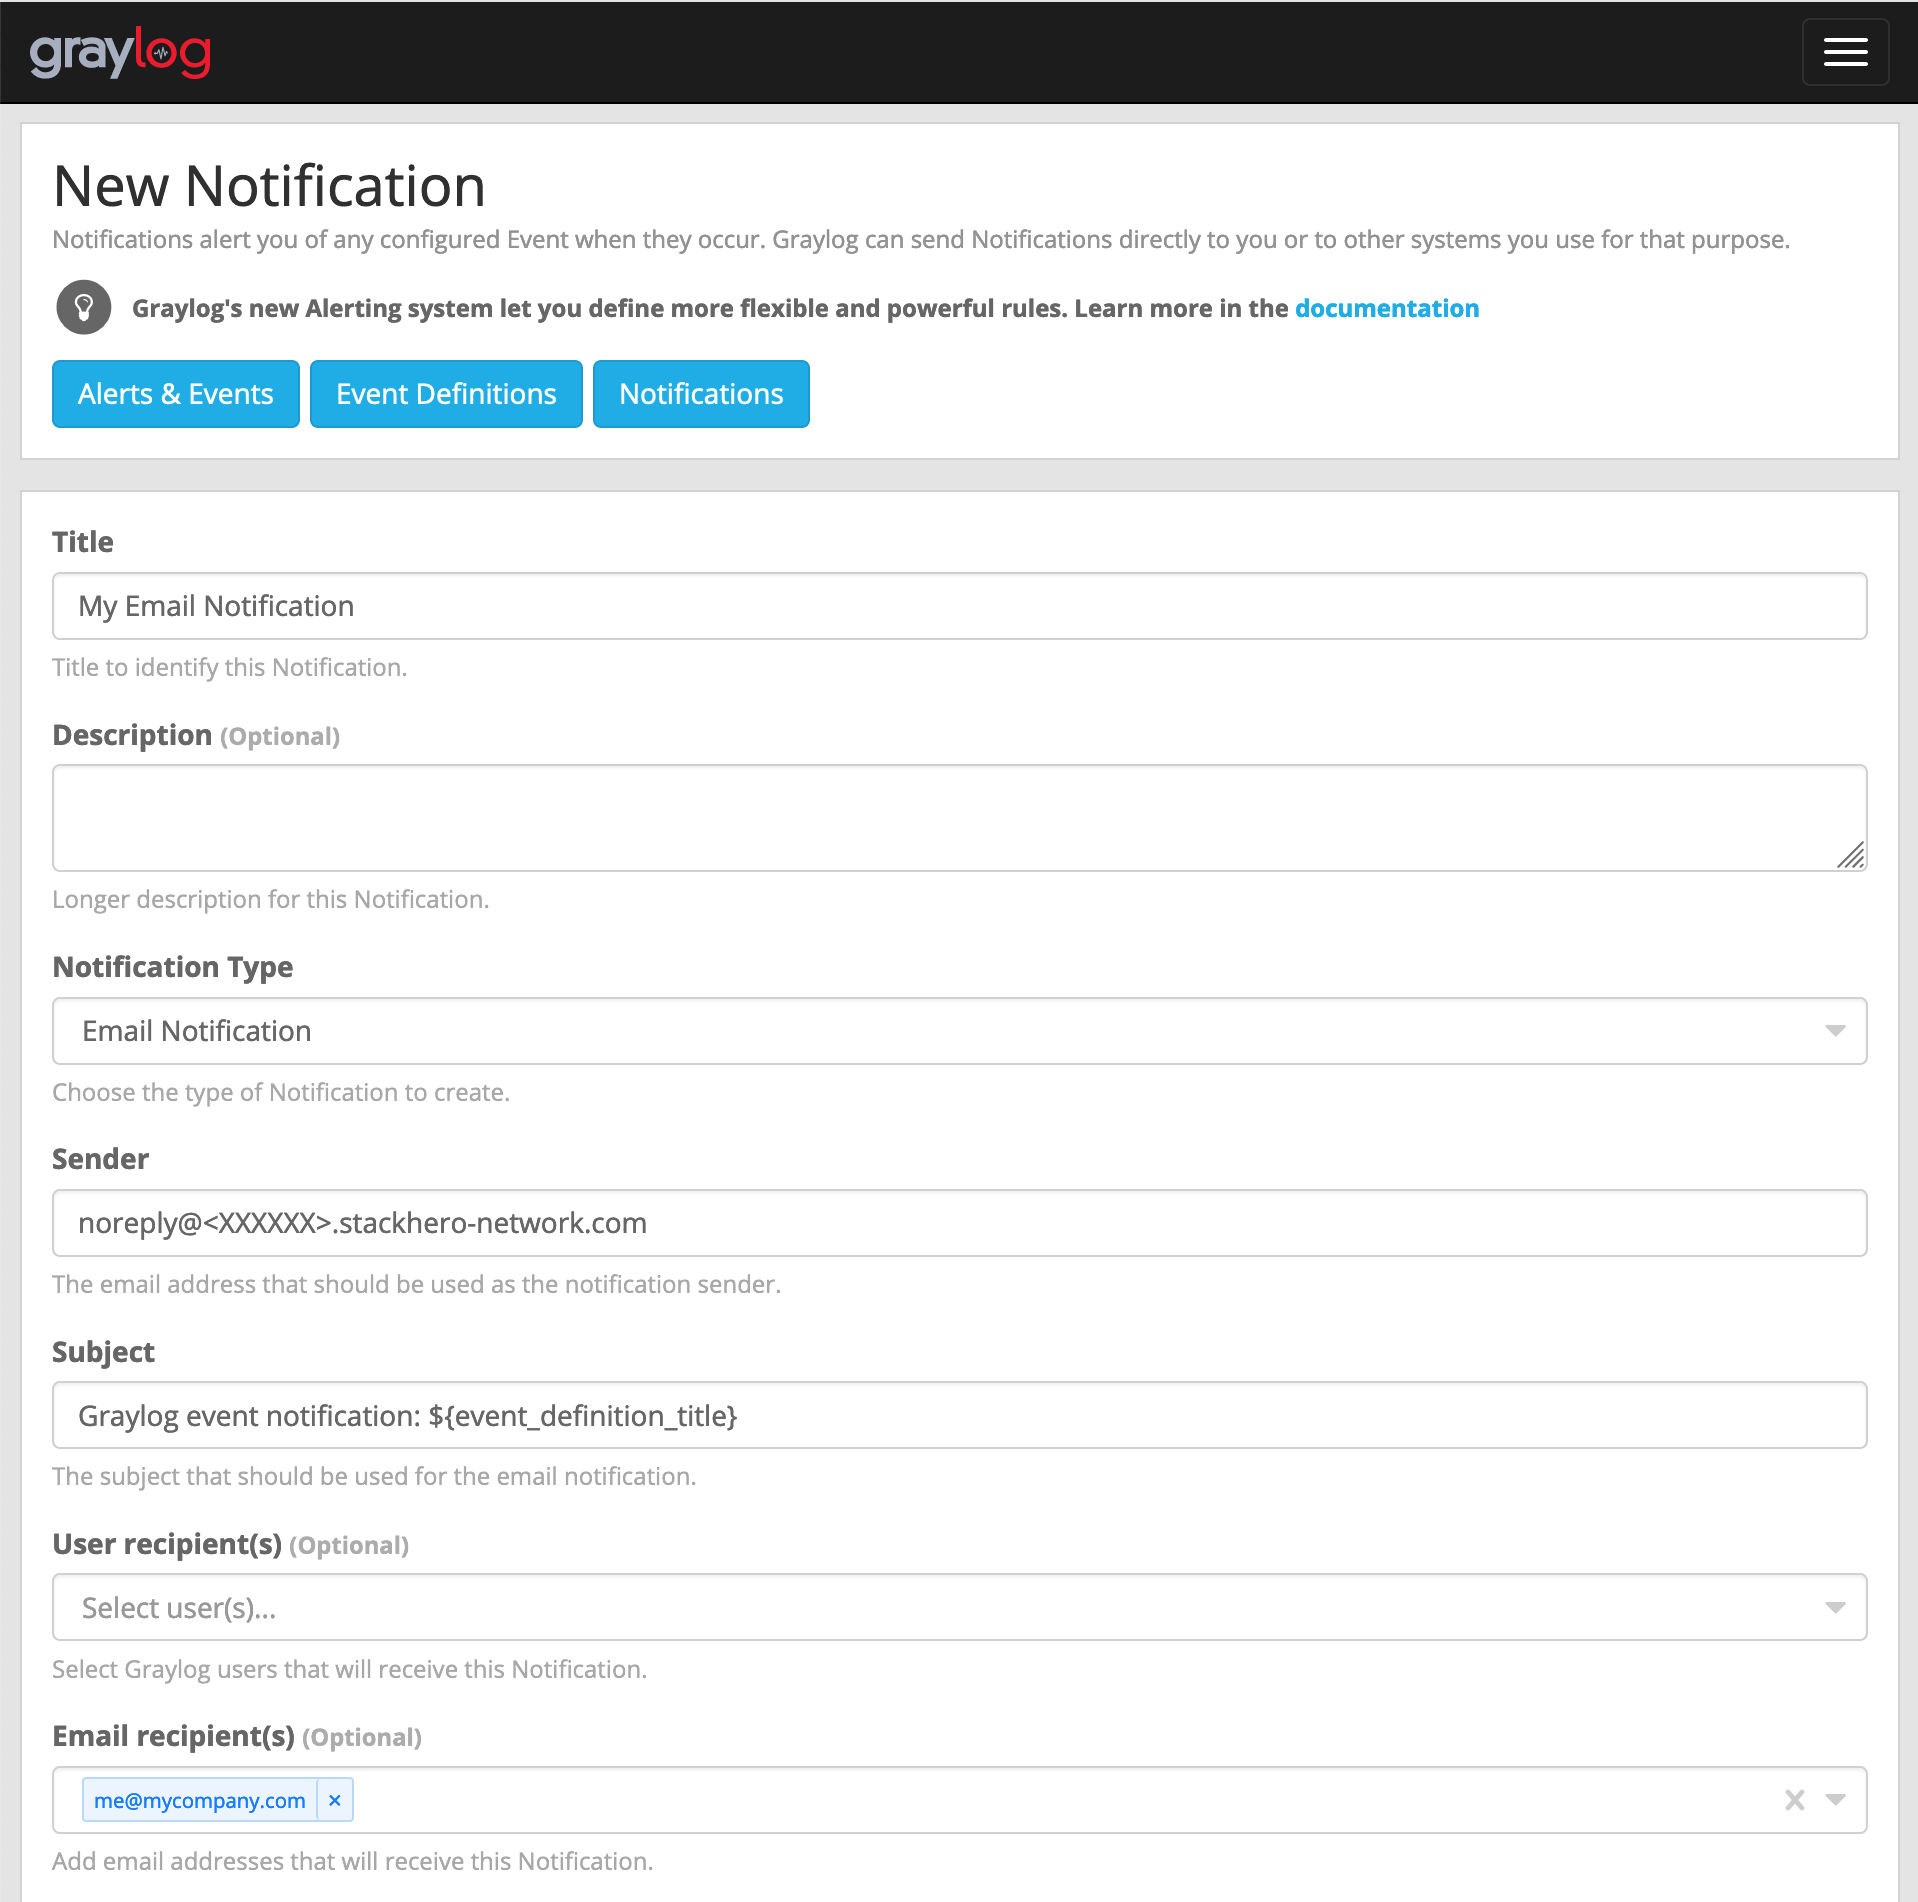 Example of email configuration
 -
Click the
Execute test notificationbutton to check that everything is working properly. Once the test is successful, complete the setup by clickingCreate.
Congratulations! Your email notification is now configured and operational!
Handling the error: "Sending the email to the following server failed: postfix:25"
If you encounter the error Error: Notification has email recipients and is triggered, but sending emails failed. Sending the email to the following server failed: postfix:25, it likely means the sender field is not properly formatted. It should follow the pattern <something>@<yourGraylogDomain>. "Something" can be anything (for example, "noreply"), but "yourGraylogDomain" must match your Graylog service domain, usually in the form <XXXXXX>.stackhero-network.com.
Configuring Slack and Mattermost notifications
To set up a Slack or Mattermost Cloud notification, you first need to obtain an "incoming webhook" from Slack or Mattermost Cloud.
Getting an incoming webhook URL from Slack
For Slack users, go to https://api.slack.com/apps and click Create New App. Fill out the form, validate it, then select Incoming Webhooks and enable them. Click Add New Webhook to Workspace and copy the Webhook URL for use in the next steps.
Getting an incoming webhook URL from Mattermost
If you prefer Mattermost Cloud, the open-source alternative to Slack, go to your Mattermost interface. From the main menu, select Integrations, then Incoming Webhooks, click Add Incoming Webhook, and complete the form. You will be provided with a URL in the format https://<domain>/hooks/<token> to copy for later use.
Configuring the notification
Before configuring Slack and Mattermost Cloud notifications, make sure the Integrations plugin is enabled in the Stackhero dashboard. To do this, select your Graylog service, click Configure, activate the Integrations plugin, and confirm the configuration.
Once the plugin is enabled, go to your Graylog instance under Alerts, Notifications, and click Get started! or Create notification.
Give your notification a title and select Slack Notification under Notification type. Paste the incoming webhook URL you obtained from Slack or Mattermost into the Webhook URL field.
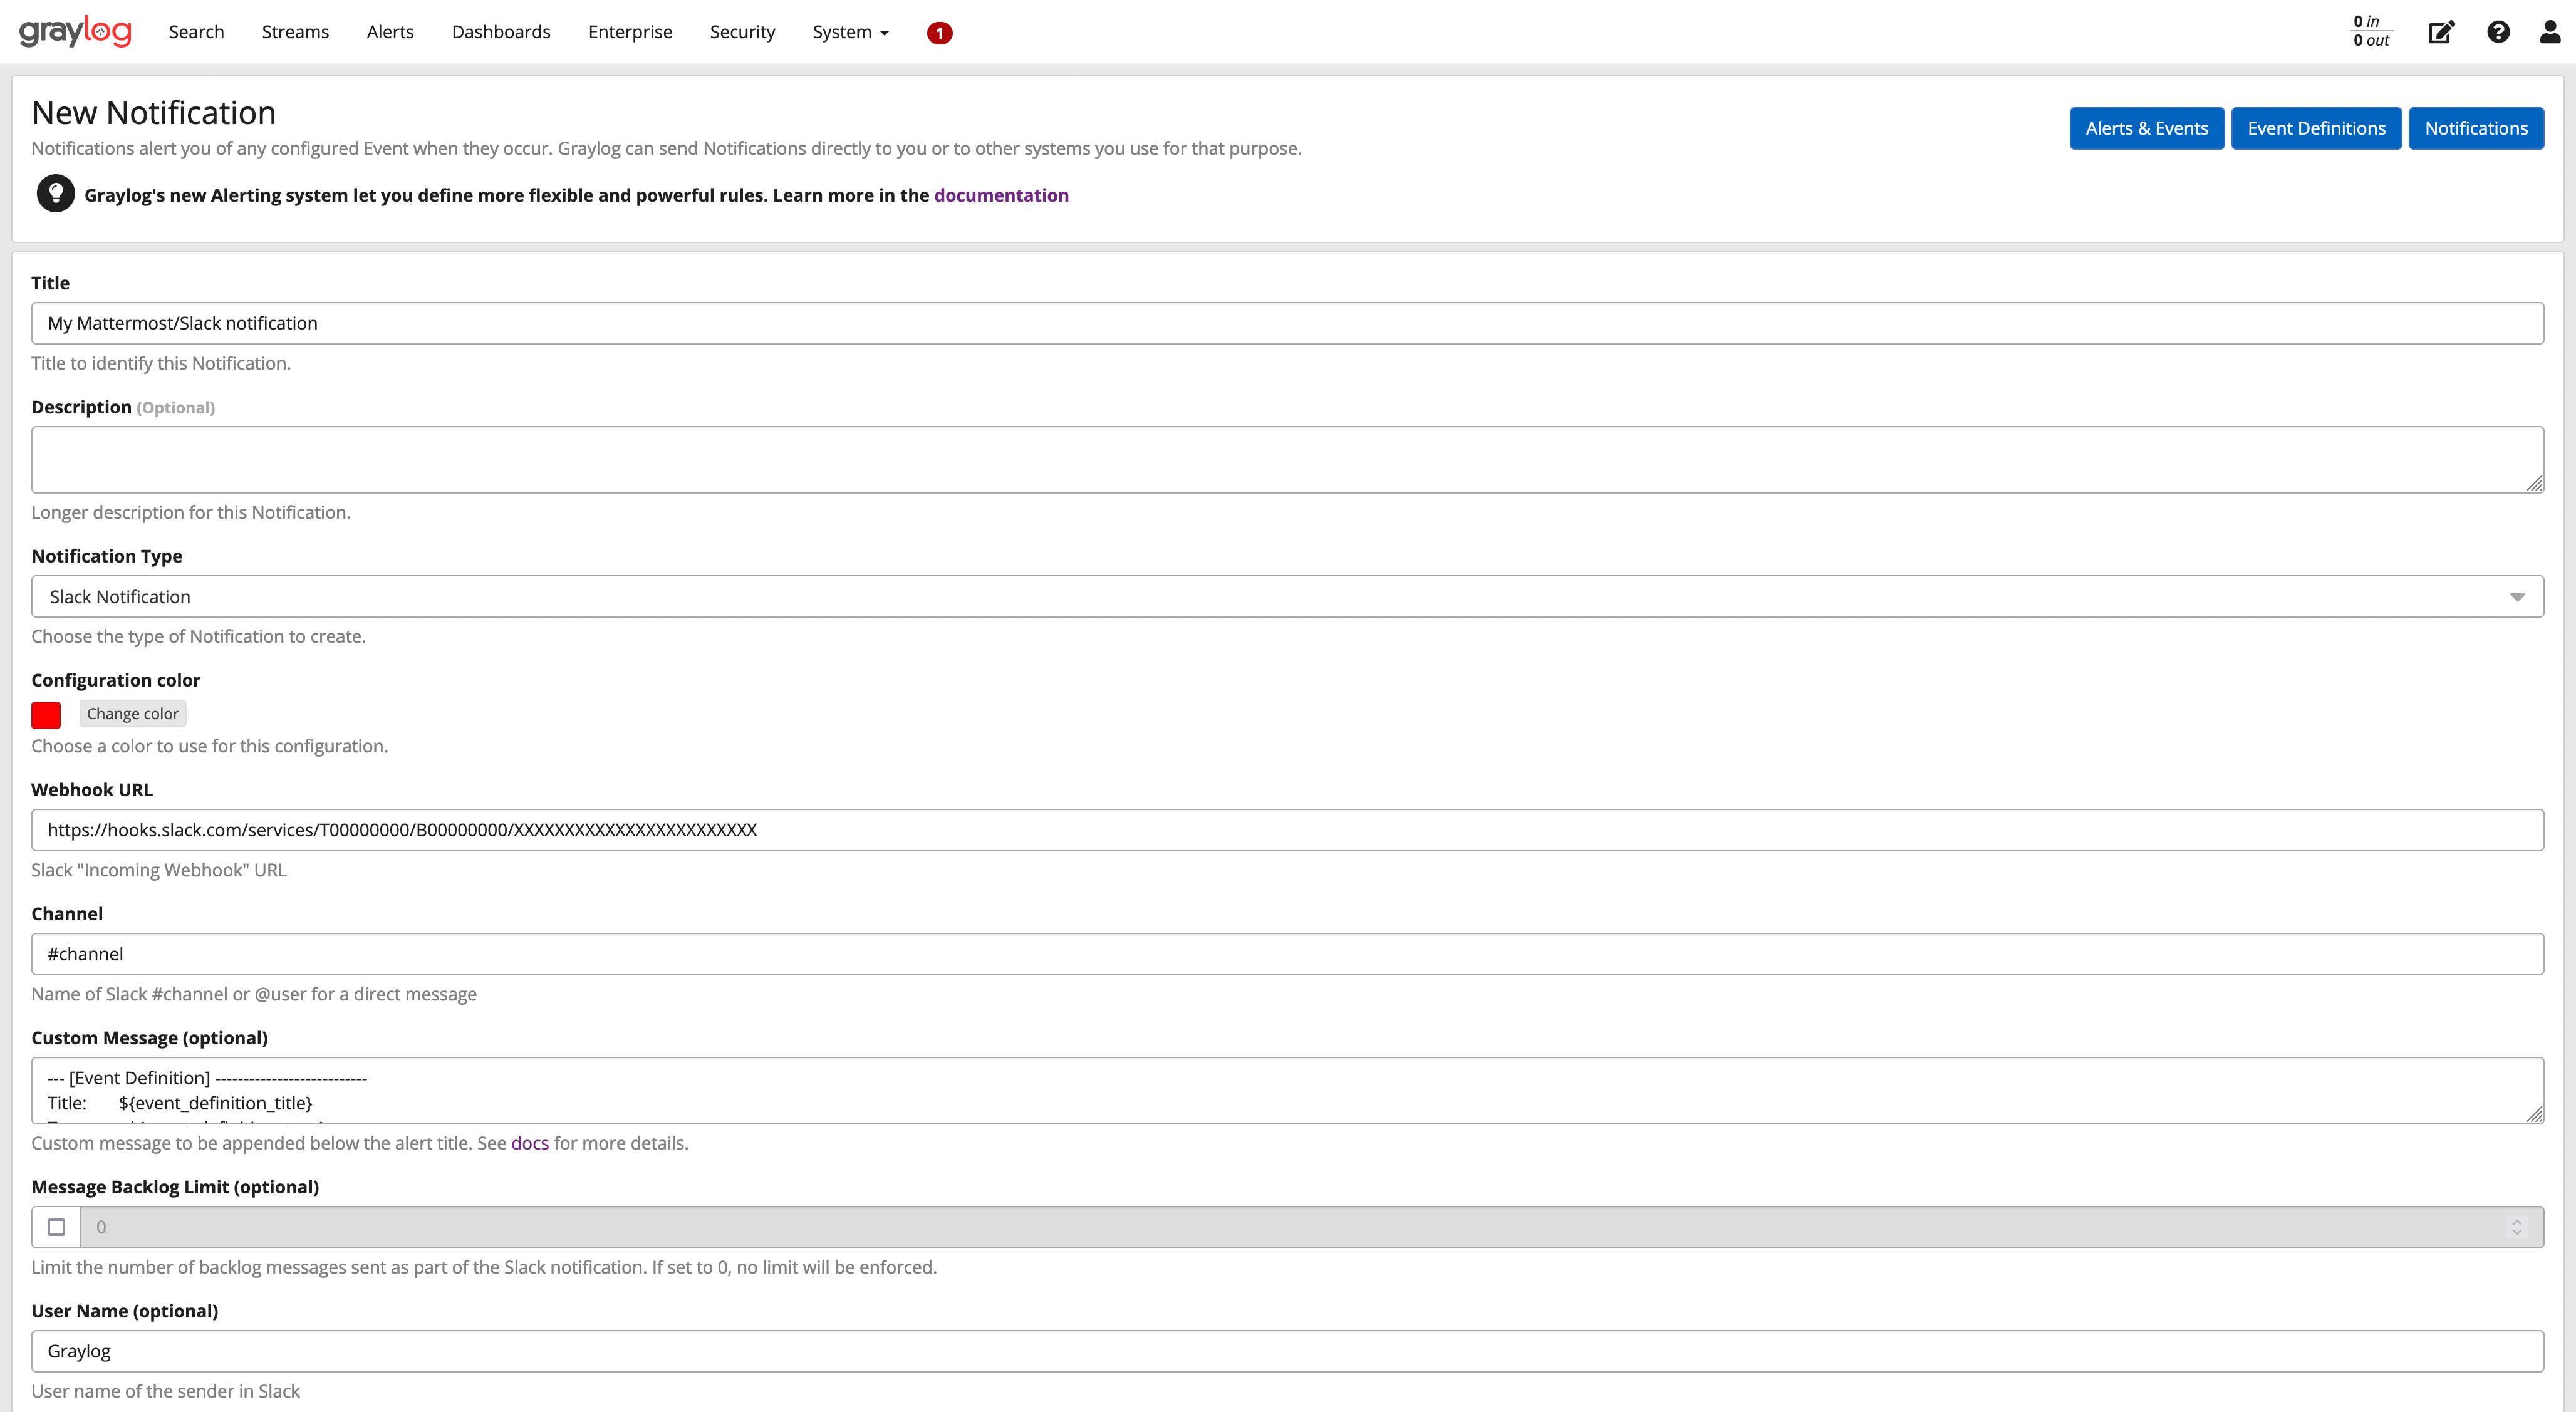 Example of a Slack/Mattermost configuration
Click the Execute Test Notification button to verify everything is working, then finalize by clicking Create.
Congratulations, your Slack/Mattermost notification is now set up and ready to use!