 Graylog: How to create an input on Graylog
This documentation is part of the Configure inputs guide. You can view the complete guide here: How to configure Graylog inputs.
👋 Welcome to Stackhero documentation
Stackhero offers a fully managed Graylog cloud solution designed for speed and simplicity. You can:
- Count on an unlimited, dedicated SMTP email server included with your service.
- Apply updates easily with a single click, with no manual intervention required.
- Use a custom domain name secured by HTTPS (for example, https://logs.your-company.com), providing your team with secure, direct access.
- Benefit from strong performance and security on a private, dedicated infrastructure with no shared resources or noisy neighbours.
Focus on your data, not your tools: you can get started with Stackhero's Graylog cloud hosting solution in just a few minutes.
To configure your Graylog input, you must first create it from the Graylog web UI. Then, declare the input on the Stackhero dashboard and open the necessary firewall port(s) to allow traffic to reach your instance.
1. Declare the input on the Graylog web UI
-
Log in to your Graylog web UI and go to
System, thenInputs. -
In the
Select inputdropdown menu, choose an input based on the type of data you will receive and clickLaunch new input.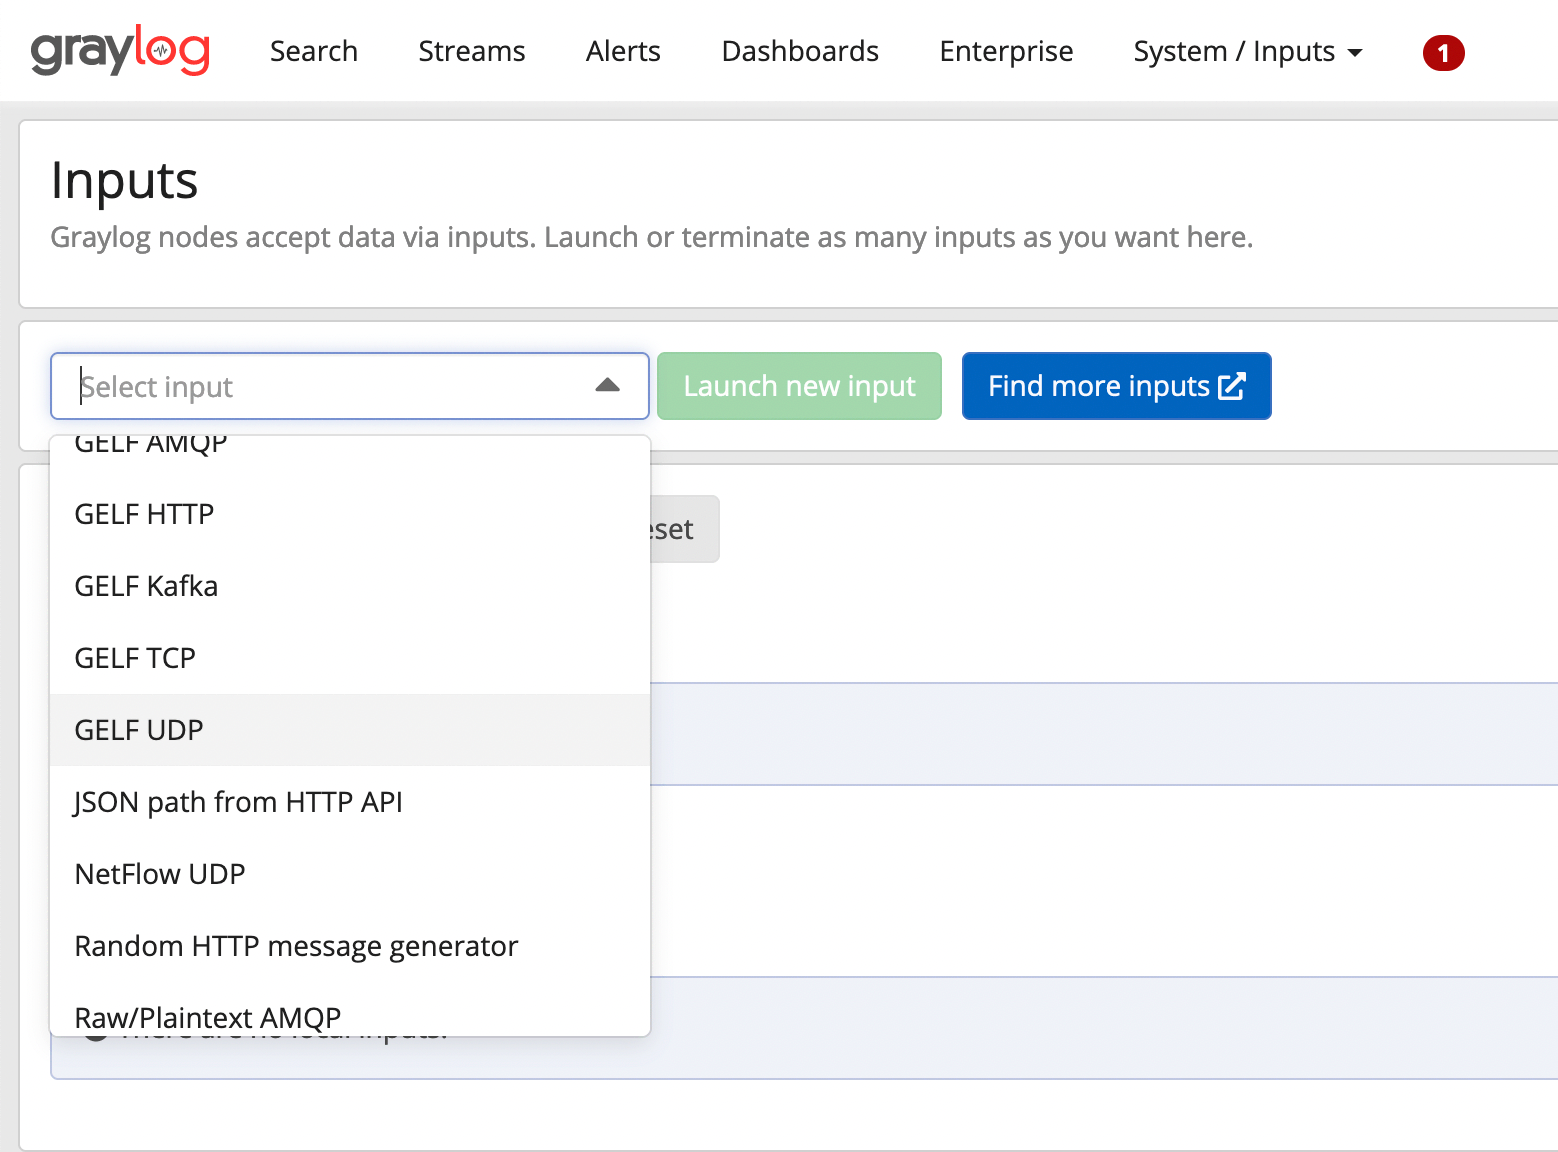 Selecting an input on Graylog web UI
 -
In the modal that opens, check
Globaland assign a title (for example, "GELF UDP" if you do not have a more specific title). Do not modify any other settings unless you are certain about the changes.
If you want to use TLS encryption (SSL/HTTPS), DO NOT select TLS in the Graylog web UI. TLS encryption is managed directly by your reverse proxy through the Stackhero dashboard.
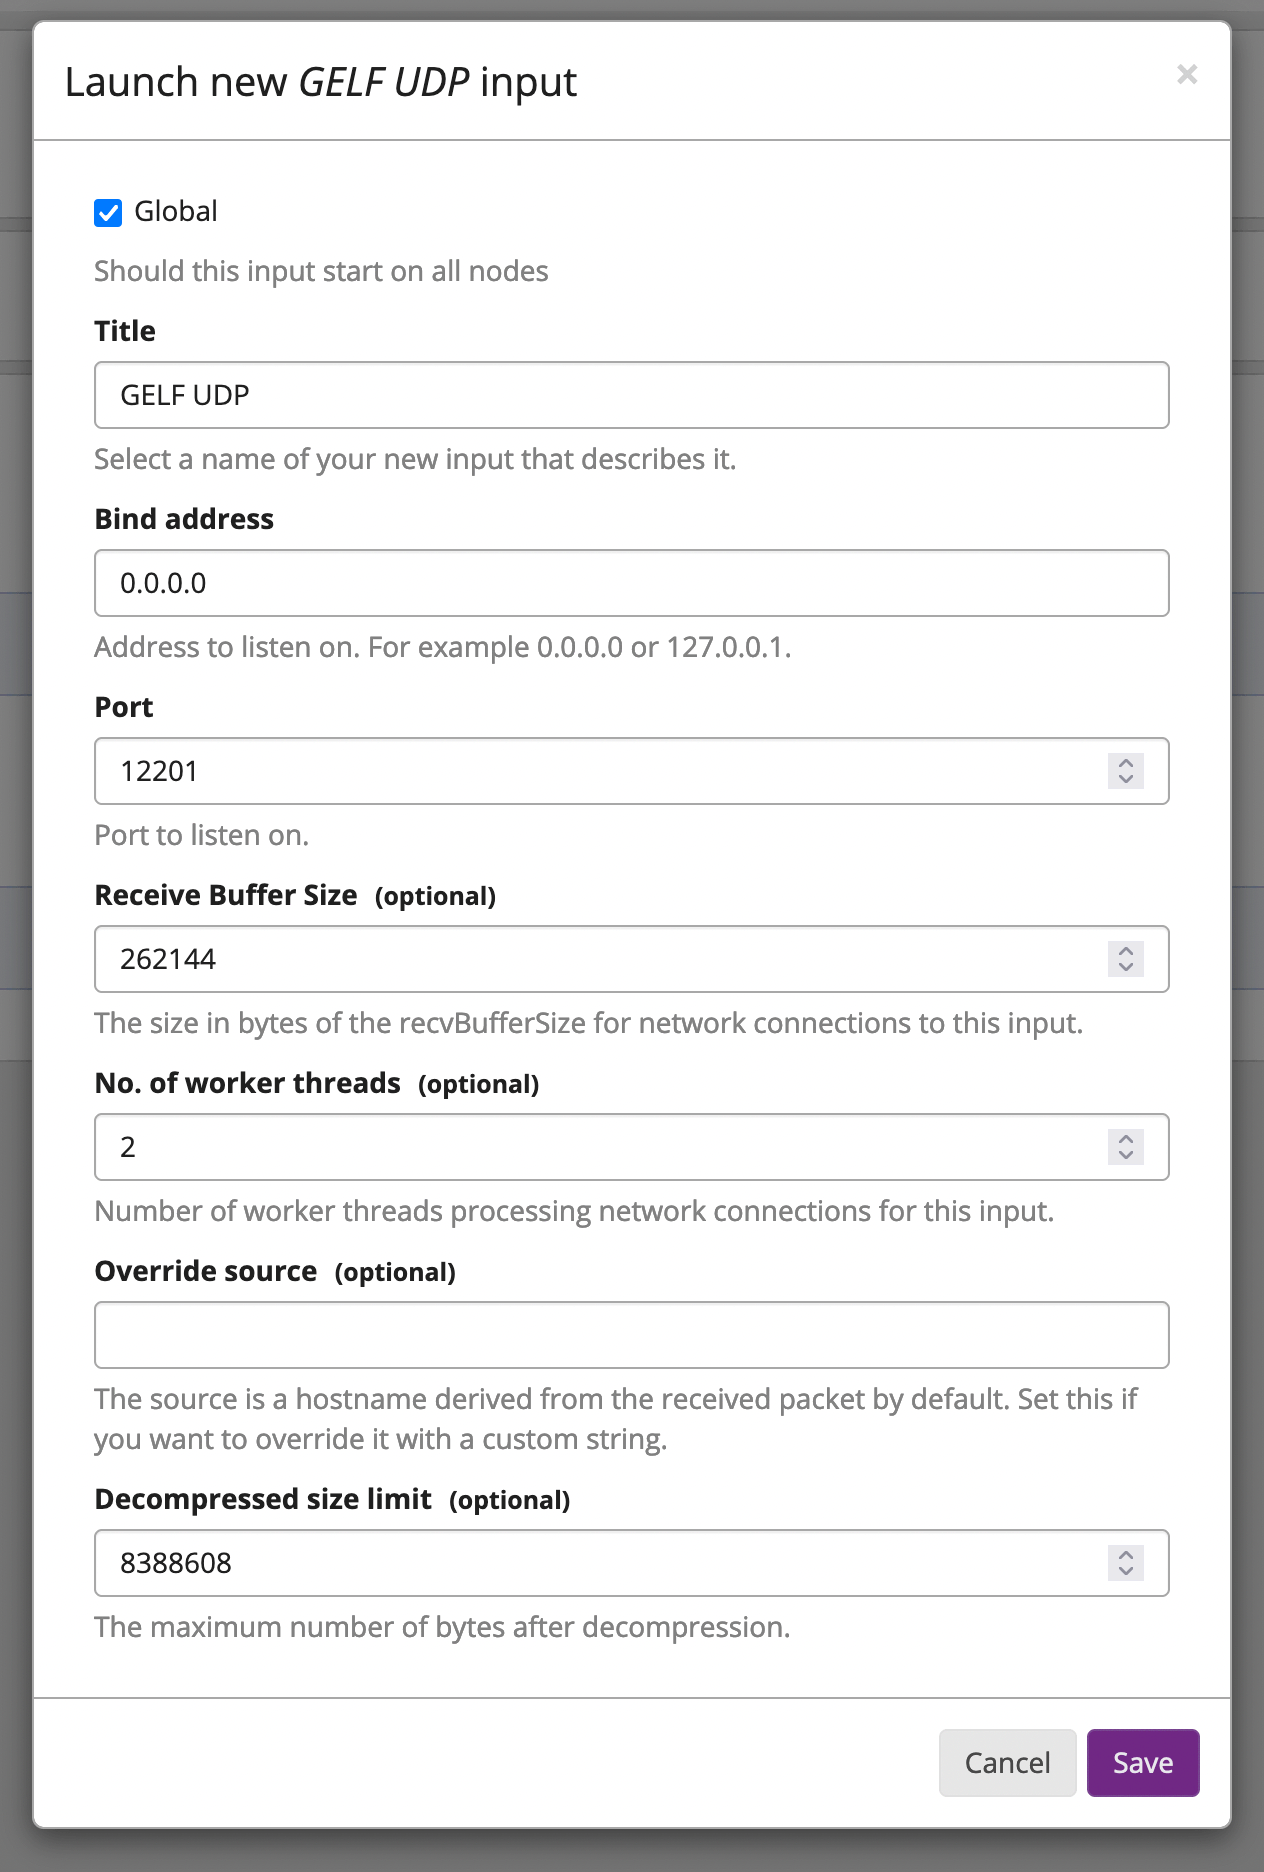 Example of a GELF UDP input in Graylog
- Note the port of your input, as you will need to specify it later on the Stackhero dashboard. Then click
Save.
2. Declare the input on Stackhero
After creating the input on the Graylog web UI, you need to declare it on the Stackhero dashboard.
- Go to your Stackhero dashboard and select your Graylog instance.
- Click on the
Configurebutton. - In the
Input portslist, check if the port of your new input is already declared. If not, add it. - Verify the protocol type (UDP or TCP). If you are using TCP, you can enable TLS encryption (SSL/HTTPS) by checking the corresponding option (remember that you should not enable TLS on the Graylog web UI!).
- Once these steps are complete, validate your new configuration.
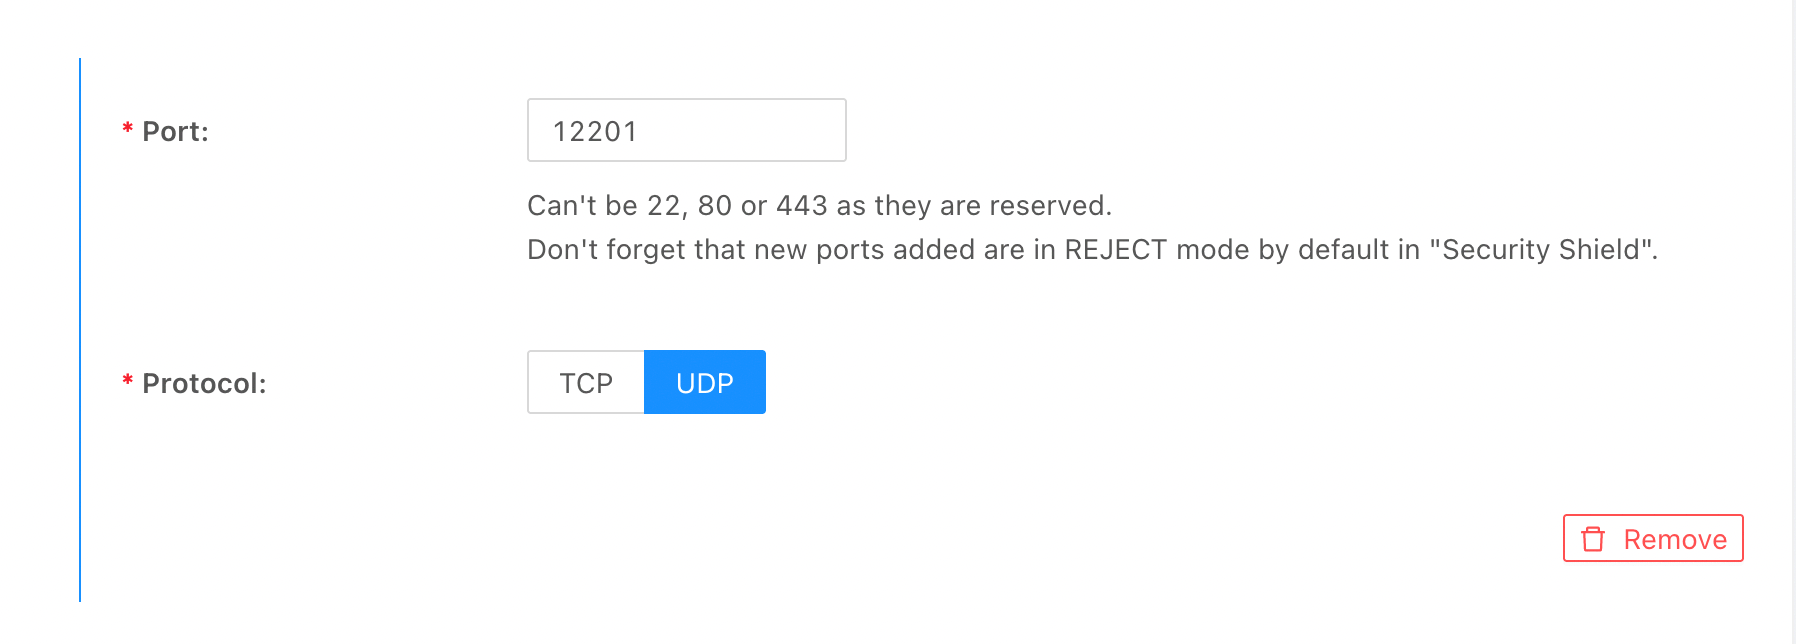 Example of a GELF UDP input configuration on Stackhero
3. Allow traffic on the firewall
Finally, after declaring your input on the Stackhero dashboard, you need to allow traffic through your firewall.
- Go to the Stackhero dashboard, select your Graylog service, and click on
Firewall. - Ensure there is a rule accepting traffic from your IP (or use
0.0.0.0/0to allow any IP). - If no such rule exists, create one by clicking the
Add a rulebutton. - Select the IP you want to allow (set it to
0.0.0.0/0for any IP), and specify the ports that will receive data from this IP. - Choose the
Acceptaction.
Save the rule and validate the configuration by clicking the Validate button.
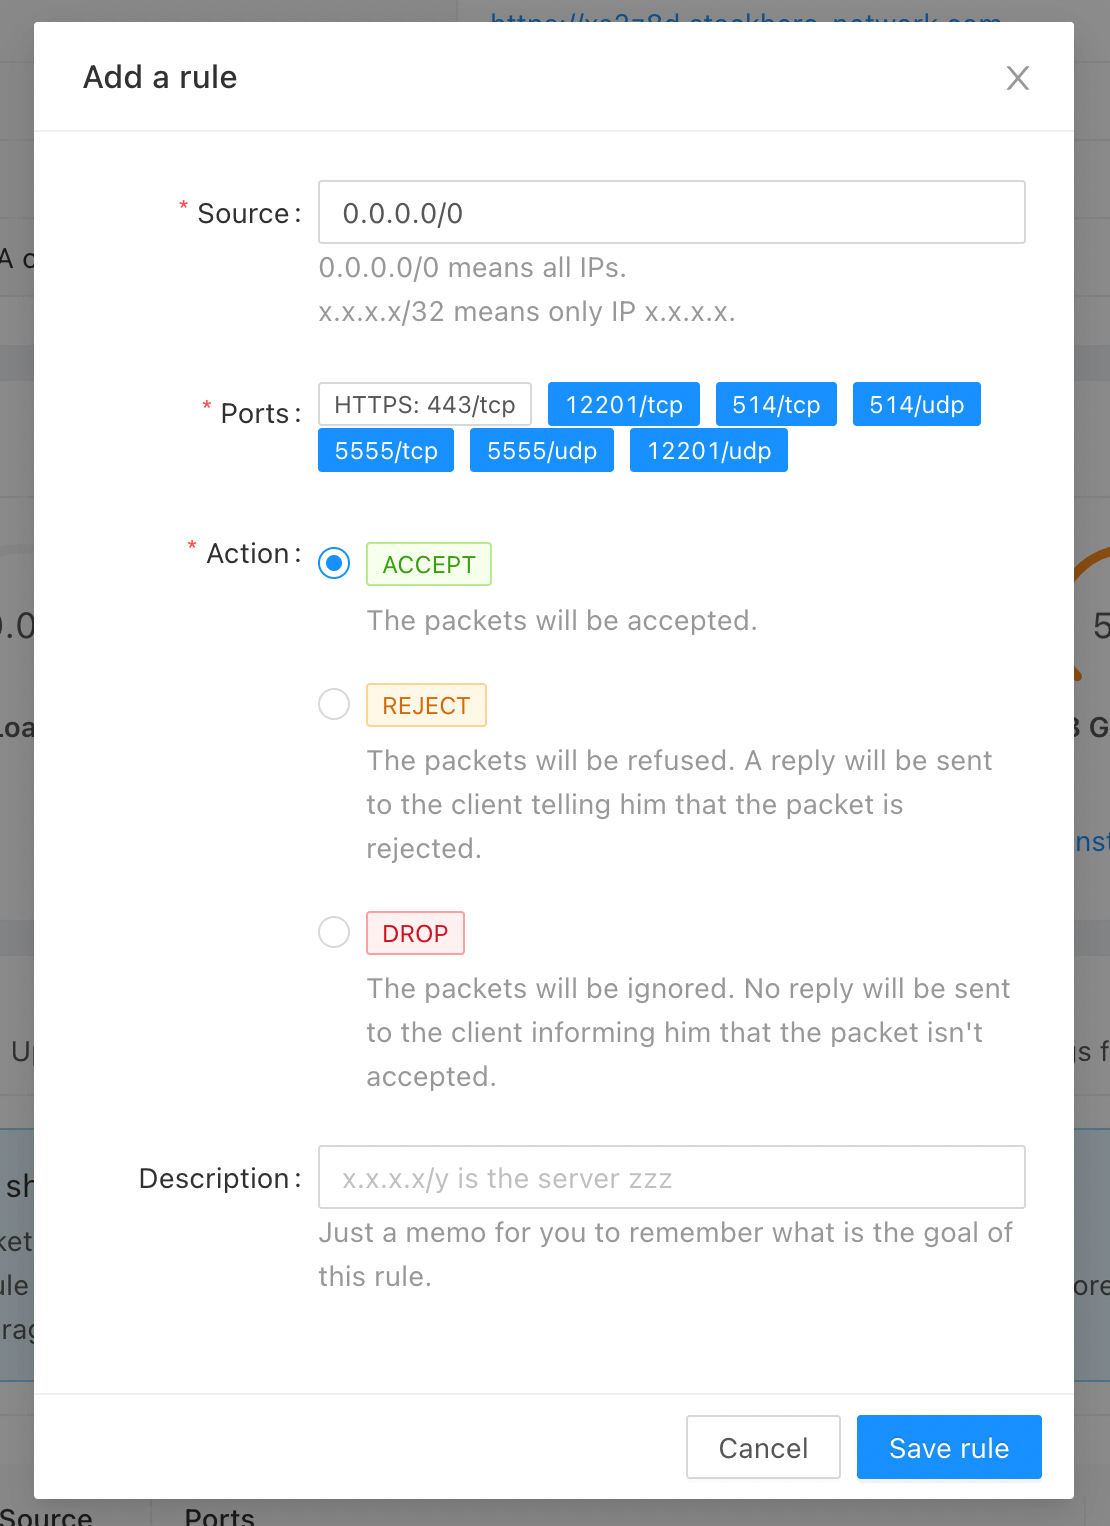 Example of a firewall configuration
Your input is now fully configured and ready to use!