 Graylog: Configure inputs
How to configure Graylog inputs
👋 Welcome to the Stackhero documentation!
Stackhero offers a ready-to-use Graylog cloud solution that provides a host of benefits, including:
- Unlimited and dedicated SMTP email server included.
- Effortless updates with just a click.
- Customisable domain name secured with HTTPS (for example, https://logs.your-company.com).
- Optimal performance and robust security powered by a private and dedicated VM.
Save time and simplify your life: it only takes 5 minutes to try Stackhero's Graylog cloud hosting solution!
What is a Graylog input
Graylog collects logs from your applications, servers, routers or switches via one or more inputs. These inputs support TCP or UDP protocols and can handle various data formats such as GELF, CEF, Syslog or RAW. TLS encryption (SSL/HTTPS) can be enabled from the Stackhero dashboard for TCP inputs.
Note that you can also connect to a Kafka or RabbitMQ (AMQP) server. In this case, Graylog will connect directly to your Kafka or RabbitMQ server and you will not need to follow this guide.
If you are unsure which type of input to use, start by reading our "Choose inputs types" guide.
How to create an input on Graylog
To configure your Graylog input, you must first create it from the Graylog web interface. Then, declare the input on the Stackhero dashboard and open the necessary firewall port(s) to allow traffic to reach your instance.
1. Declare the input on the Graylog web interface
-
Log in to the Graylog web interface and go to
System, thenInputs. -
In the
Select inputdropdown menu, choose an input based on the type of data you will receive and clickLaunch new input.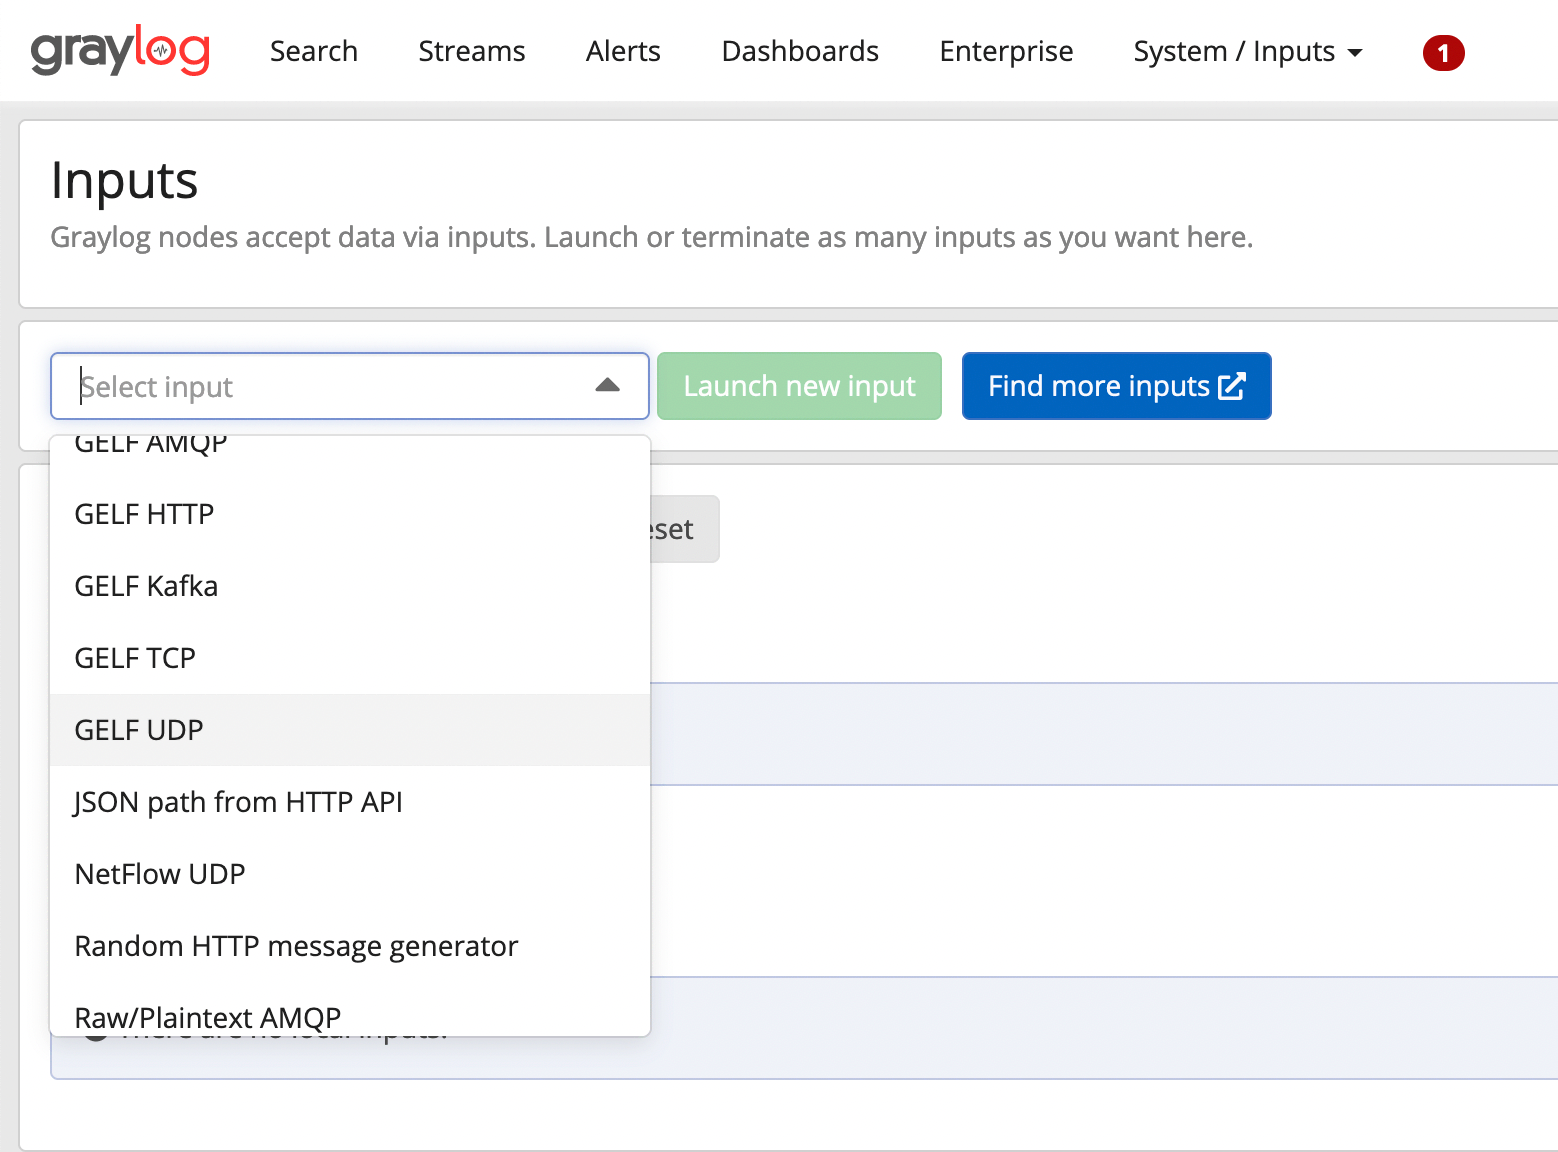 Selecting an input on Graylog web UI
 -
In the window that opens, tick
Globaland assign a title (for example, "GELF UDP" if you do not have a more specific title). Do not modify any other settings unless you are certain of what you are doing.
If you wish to use TLS encryption (SSL/HTTPS), DO NOT select TLS in the Graylog web interface. TLS encryption is managed directly by your reverse proxy via the Stackhero dashboard.
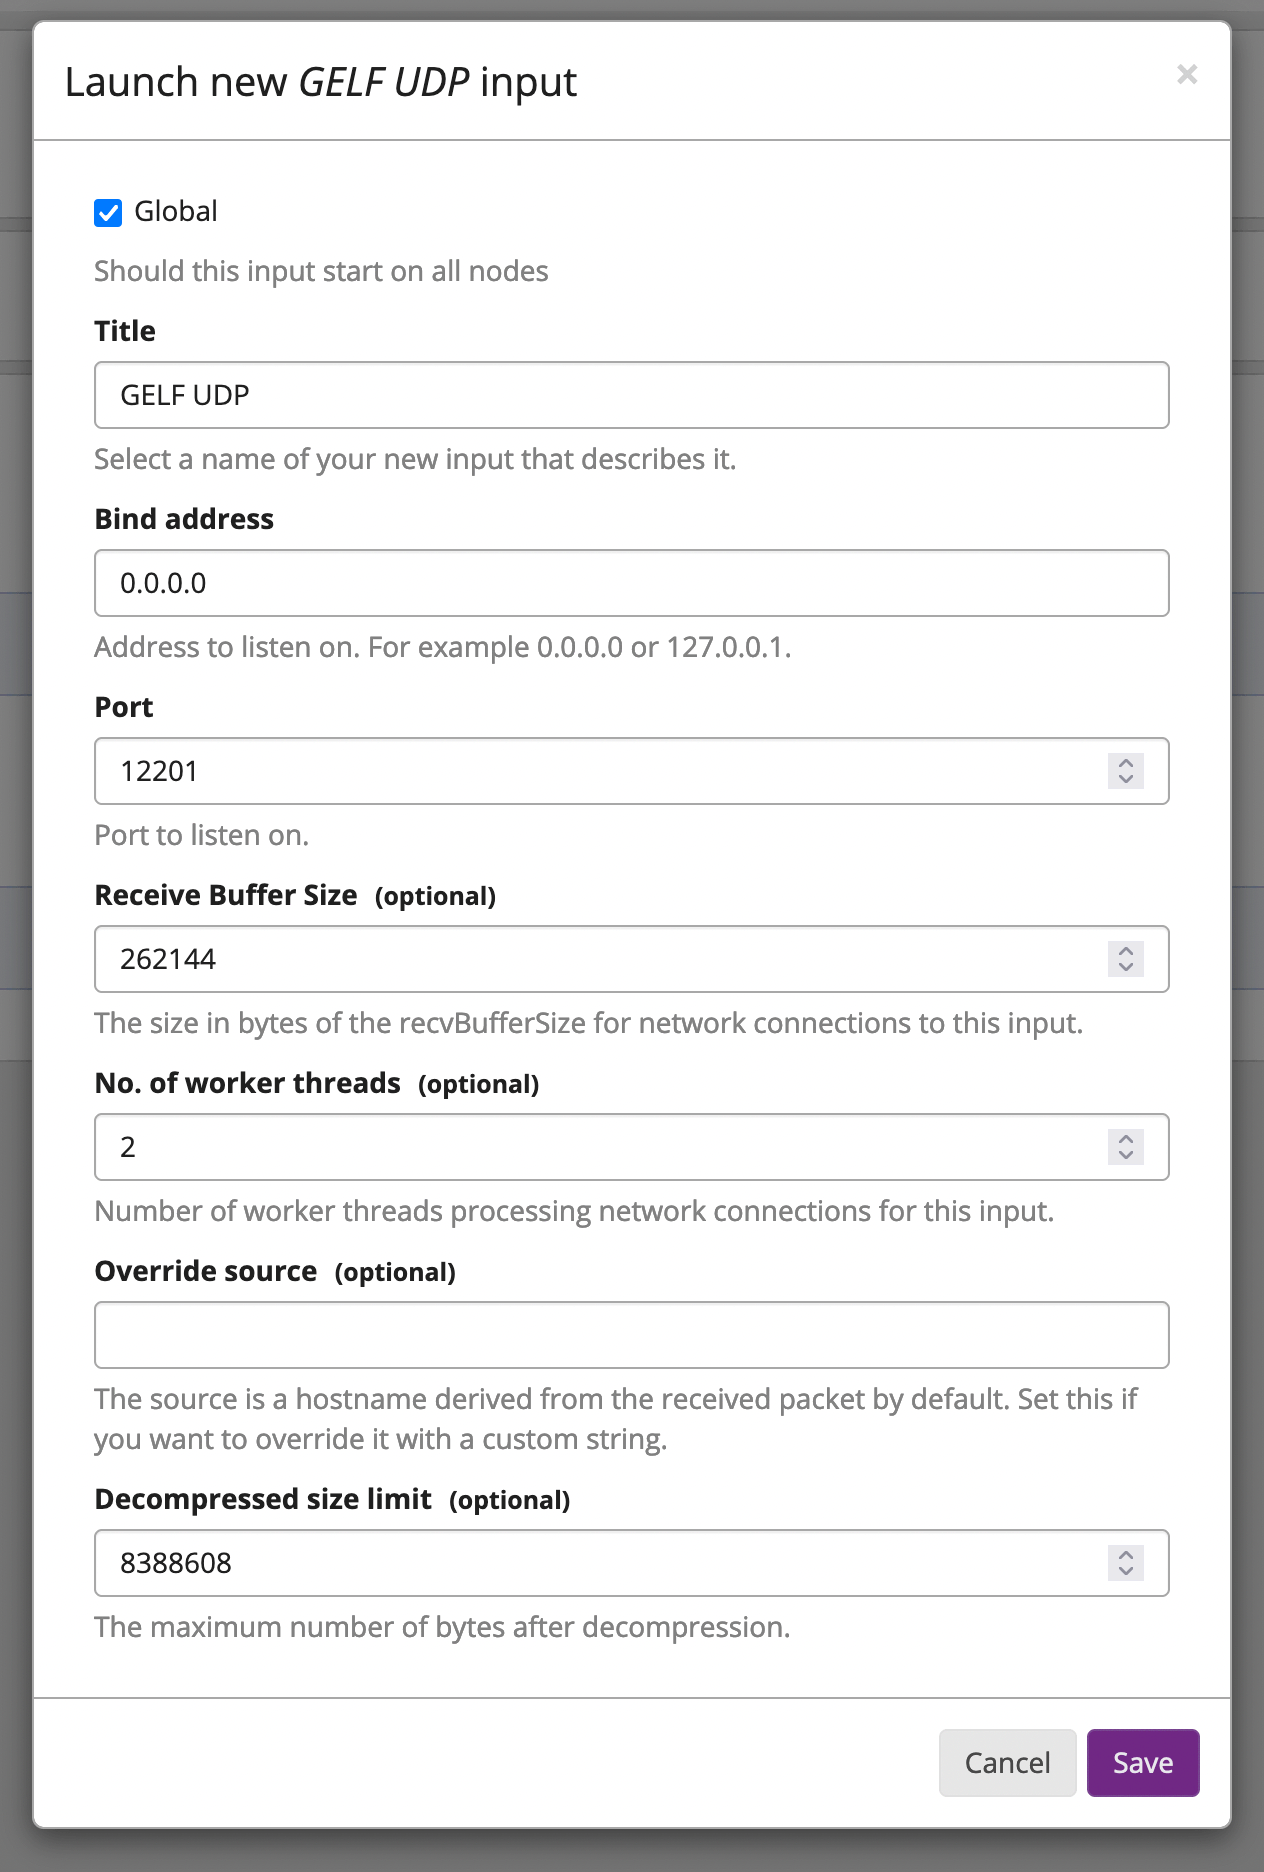 Example of a GELF UDP input in Graylog
- Note the port of your input, as you will need to specify it later on the Stackhero dashboard. Then click
Save.
2. Declare the input on Stackhero
After creating the input on the Graylog web interface, you need to declare it on the Stackhero dashboard.
- Go to your Stackhero dashboard and select your Graylog instance.
- Click on the
Configurebutton. - In the
Input portslist, check if the port for your new input is already declared. If not, add it. - Check the protocol type (UDP or TCP). If you are using TCP, you can enable TLS encryption (SSL/HTTPS) by ticking the corresponding option (remember that you should not enable TLS on the Graylog web interface!).
- Once these steps are complete, validate your new configuration.
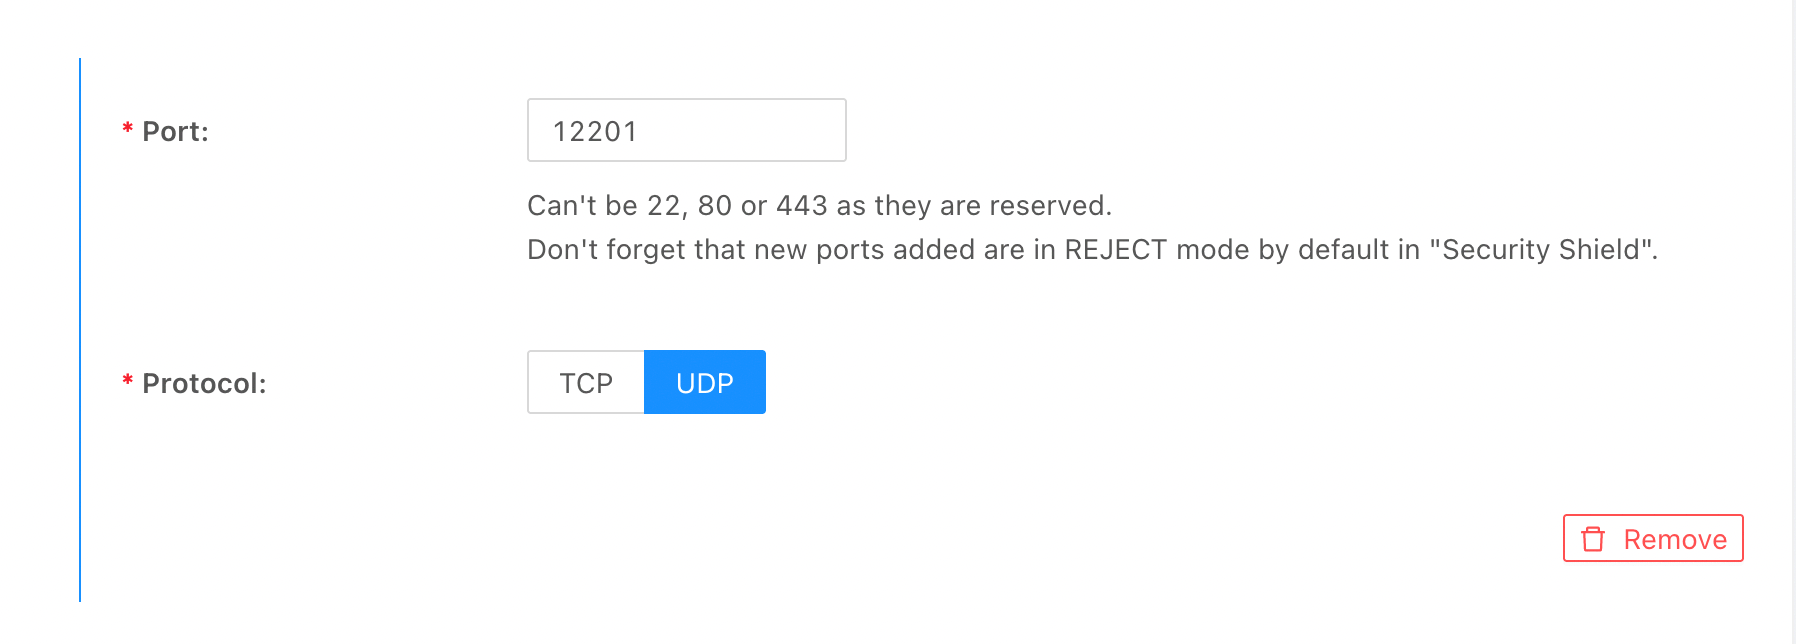 Example of a GELF UDP input configuration on Stackhero
3. Allow traffic through the firewall
Finally, after declaring your input on the Stackhero dashboard, you need to allow traffic through your firewall.
- Go to the Stackhero dashboard, select your Graylog service, and click on
Firewall. - Check that there is a rule accepting traffic from your IP (or use
0.0.0.0/0to allow all IPs). - If no such rule exists, create one by clicking the
Add a rulebutton. - Select the IP you wish to allow (set it to
0.0.0.0/0for all IPs), and specify the ports that will receive data from this IP. - Choose the
Acceptaction.
Save the rule and validate the configuration by clicking the Validate button.
 Example of a firewall configuration
Your input is now fully configured and ready to use!
Troubleshooting: a Graylog input does not work
If a Graylog input is not working as expected, check the following points:
-
On the Graylog web interface:
- Go to
SystemthenInputsand confirm that the input is running. - Check that the protocol (UDP or TCP) is correct.
- If you are using TCP, ensure that
tls_enableis set tofalseas encryption is managed on the Stackhero dashboard. - Confirm that the port is correct.
- Check that the data format is correct (GELF, CEF, RAW or Syslog).
- Go to
-
On the Stackhero dashboard:
- Select your Graylog instance and click the
Configurebutton. - In the
Input portslist, ensure that the port is defined with the appropriate protocol (UDP or TCP). - If you are using TCP, check that the TLS option is enabled for encryption (SSL/HTTPS).
- Select your Graylog instance and click the
-
On the firewall:
- In the Stackhero dashboard, select your Graylog instance and click on the
Firewalltab. - Check that there is a rule accepting traffic for the input port and protocol. If you wish to allow all IPs, set the IP field to
0.0.0.0/0.
- In the Stackhero dashboard, select your Graylog instance and click on the
By following this checklist, your input should work correctly.