 Node-RED: Configuring your remote repository
This documentation is part of the Manage projects guide. You can view the complete guide here: How to use "Projects" in Node-RED.
Welcome to the Stackhero documentation
Stackhero offers a fully managed Node-RED cloud environment designed to help you build workflows quickly:
- Integrated MQTT server (Mosquitto) for seamless IoT integration.
- Full access to the Node-RED admin interface for managing your flows and settings.
- Node-RED Dashboard included for real-time visualisation.
- Dedicated SMTP email server included, with no sending limits.
- Effortless one-click updates to keep your instance up to date.
- Custom domain names with automatic HTTPS: for example, https://node-red.your-company.com.
- High performance and enhanced security thanks to private, dedicated infrastructure.
You can have a secure, production-ready Node-RED cloud hosting instance running in around 5 minutes. Stackhero takes care of installation, updates, and infrastructure, so you can focus on building your automations.
To connect Node-RED to a remote repository, follow these steps (the example here uses GitHub, but the process is similar for other platforms):
- Add your public key in your chosen platform's settings.
- Retrieve the SSH URL for your Git repository.
You can either create a new repository or use an existing one. On GitHub, open your repository, go to Settings, then Deploy keys, and click Add deploy key. Paste in the public key you copied earlier, give it a clear name such as "Node-RED", tick the Allow write access box, and click Add key.
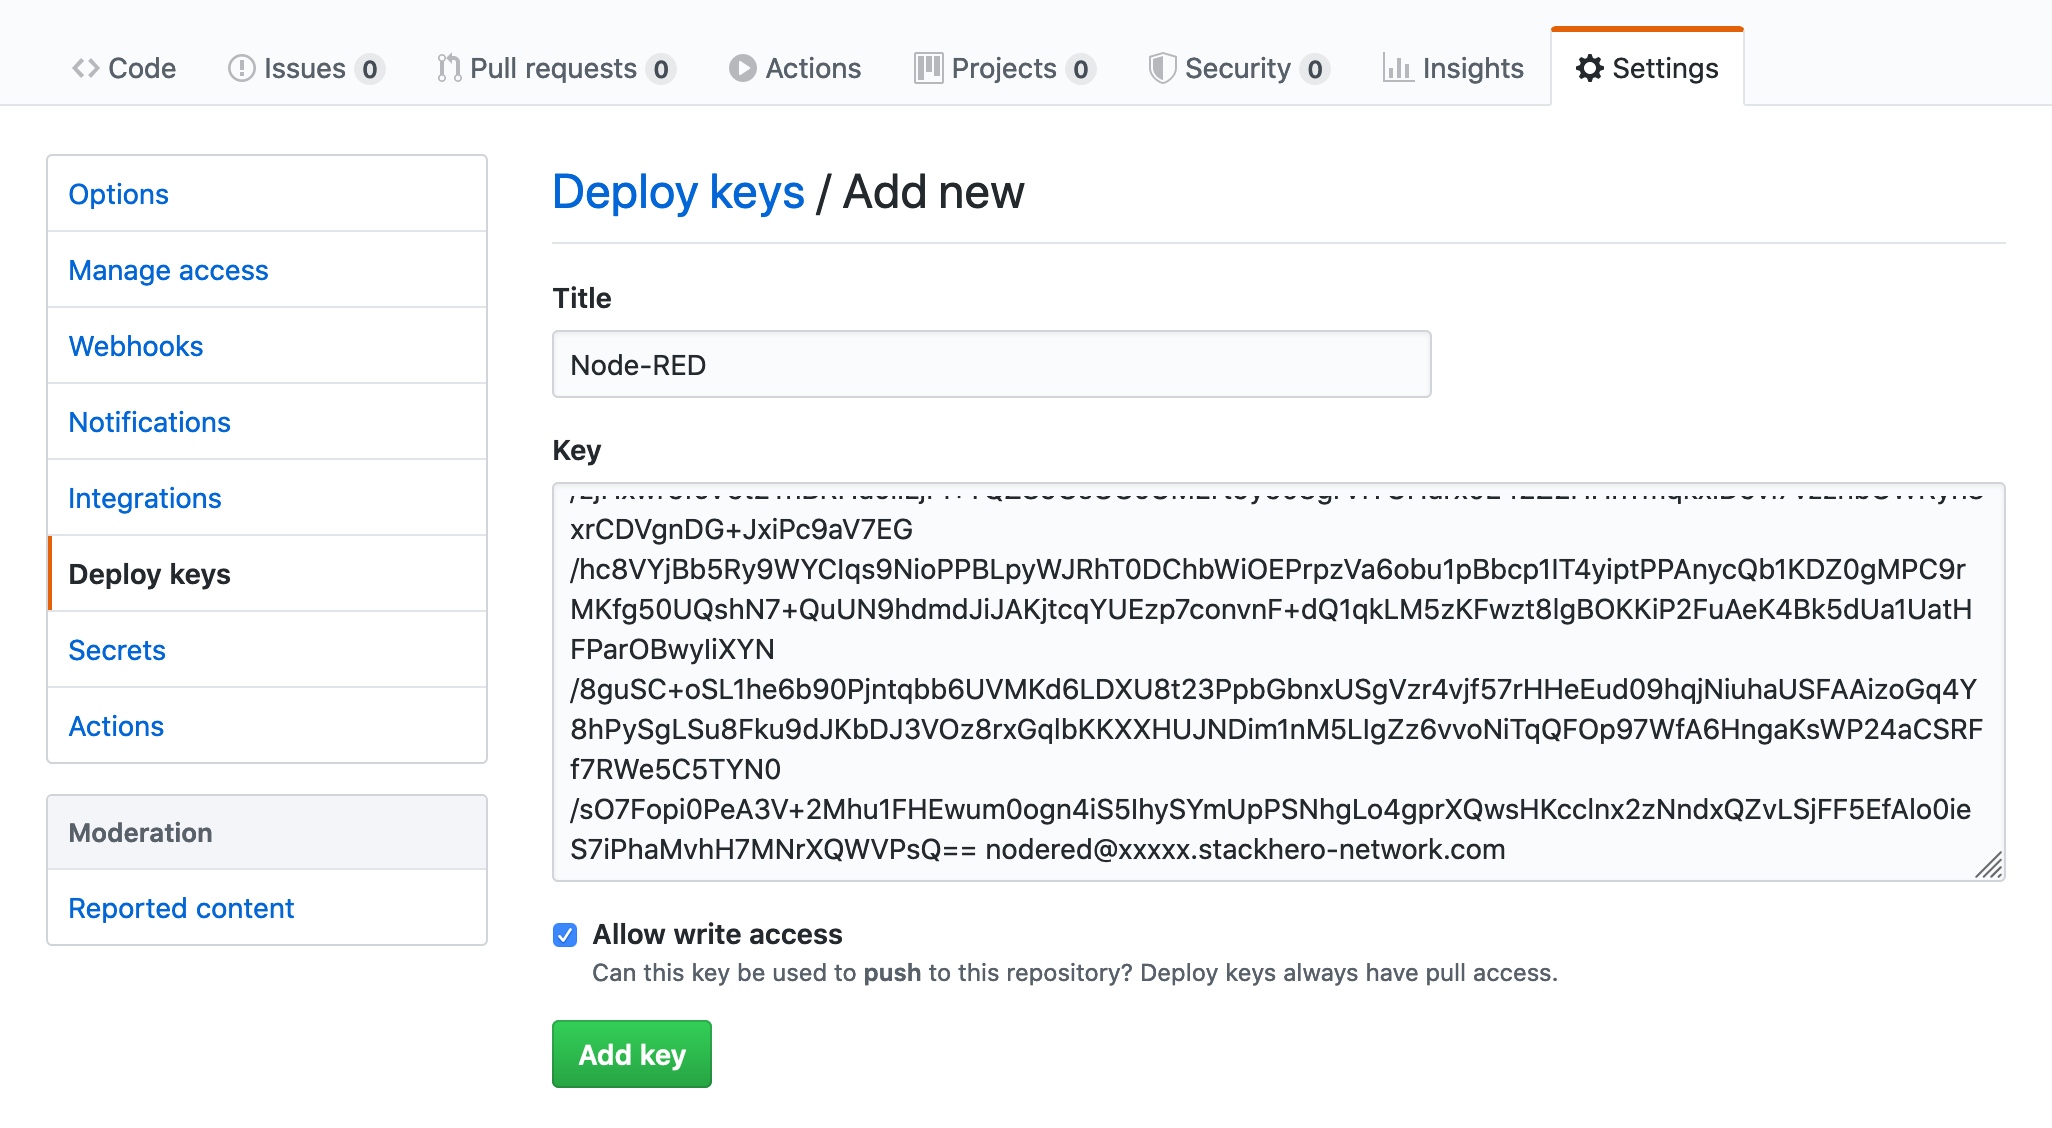 Add public key on GitHub
Return to your repository's Code tab and copy the SSH URL. This will generally look like [email protected]:<yourOrganization>/<yourRepositoryName>.git. If you are working with an existing repository, you will find this URL by clicking the Clone or download button.