 Node-RED: MQTT server
How to connect Node-RED to the Mosquitto MQTT server
Welcome to the Stackhero documentation
Stackhero offers a fully managed Node-RED cloud environment designed to help you build workflows quickly:
- Integrated MQTT server (Mosquitto) for seamless IoT integration.
- Full access to the Node-RED admin interface for managing your flows and settings.
- Node-RED Dashboard included for real-time visualisation.
- Dedicated SMTP email server included, with no sending limits.
- Effortless one-click updates to keep your instance up to date.
- Custom domain names with automatic HTTPS: for example, https://node-red.your-company.com.
- High performance and enhanced security thanks to private, dedicated infrastructure.
You can have a secure, production-ready Node-RED cloud hosting instance running in around 5 minutes. Stackhero takes care of installation, updates, and infrastructure, so you can focus on building your automations.
Stackhero's Node-RED service includes an integrated MQTT server, making it straightforward to connect your IoT devices via secure and reliable communication channels.
To get started, simply go to your Stackhero dashboard, select your Node-RED service, and enable the "MQTT Server" option in the service configuration settings.
Once the server is enabled, you can connect to it on port 8883. All connections are protected with TLS encryption, ensuring your data remains secure.
Simple example: using Node-RED with the MQTT server
If you are new to using MQTT with Node-RED, here is a simple example to help you get started quickly. This example demonstrates how to send a message to a topic and receive messages from it. You can download the flow example and import it into your Node-RED instance using the "Import" menu.
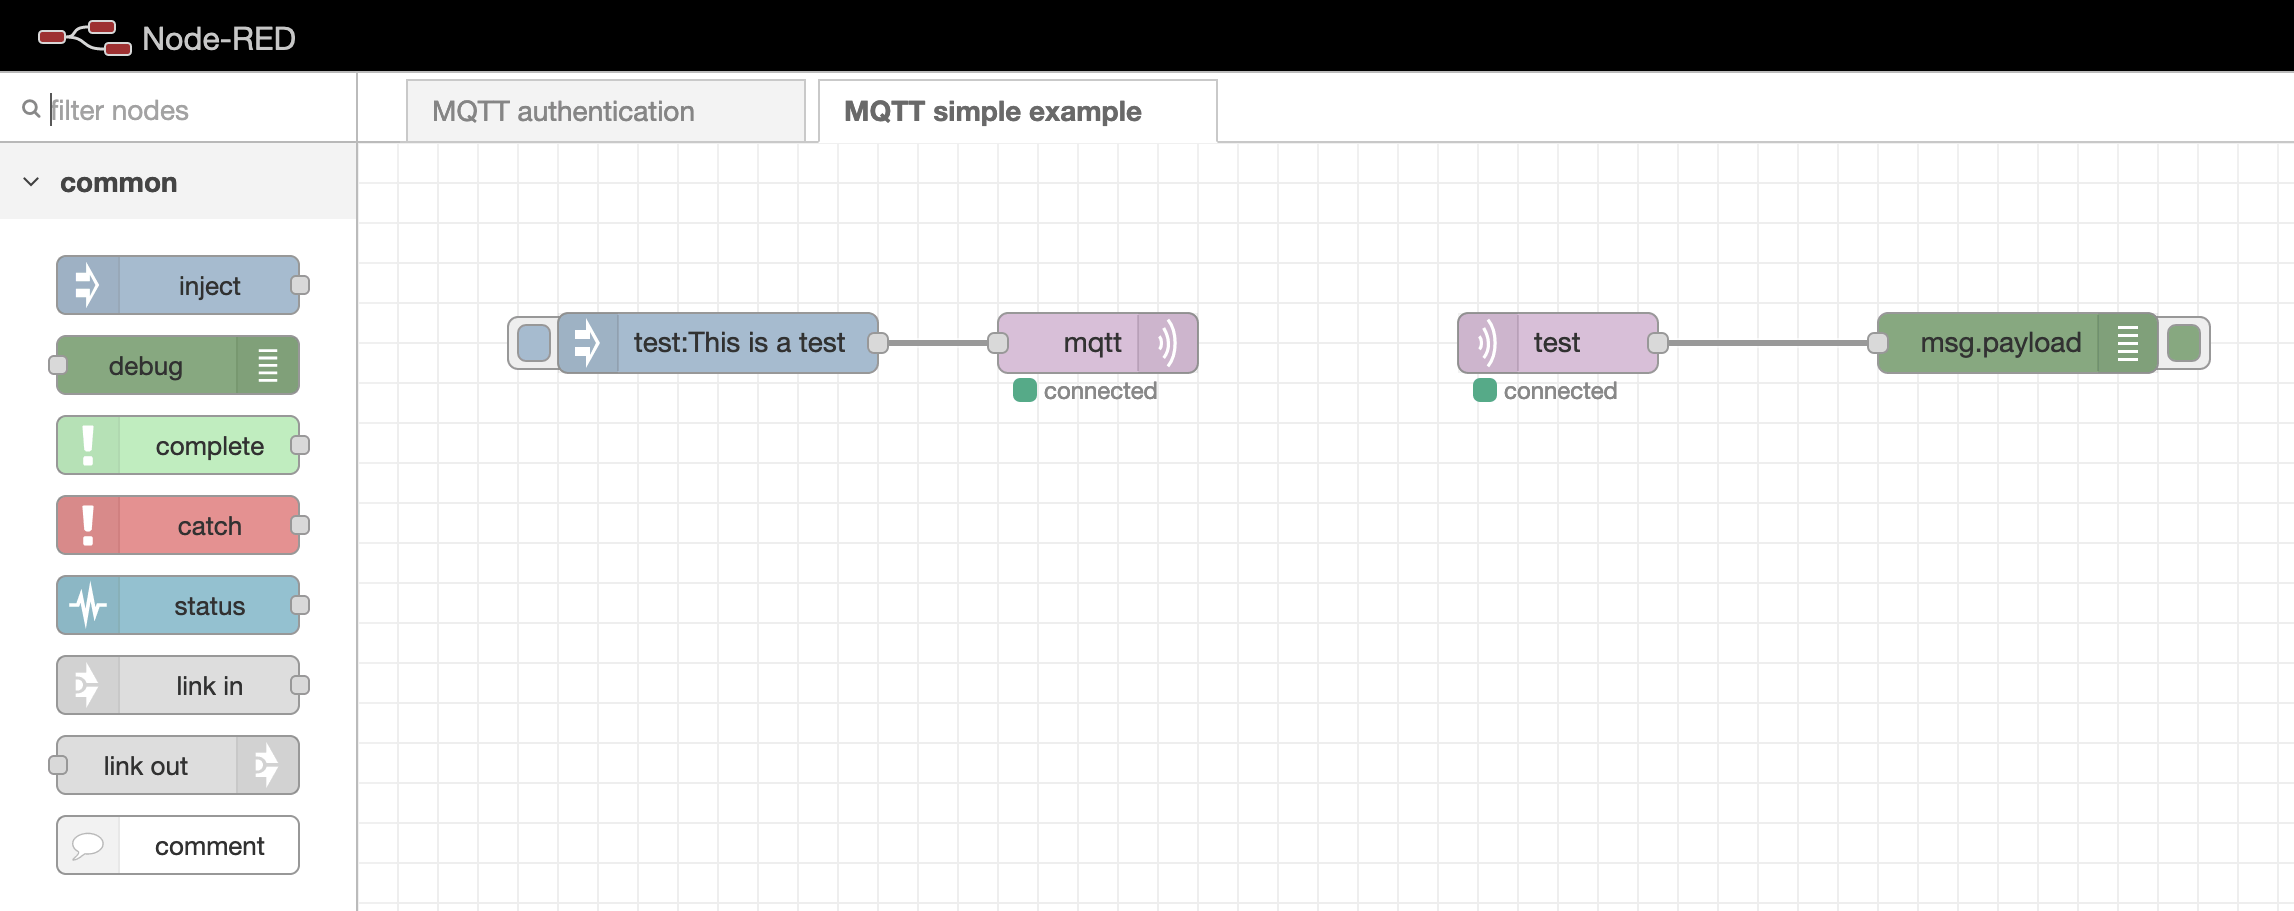 Simple example of connecting MQTT to Node-RED
If your MQTT nodes are stuck in the "connecting" state, it is advisable to check whether the
MQTT authenticationflow is still present. If it is missing, you can download it here: mqttAuthenticationFlow.json. Import this flow into your Node-RED instance, update theUsersnode with your chosen passwords, and remove any unnecessary comments as needed.
Authenticating MQTT users in Node-RED
Managing MQTT user authentication is straightforward with a dedicated flow in Node-RED. You will find the "MQTT Authentication" flow directly from the Node-RED admin panel.
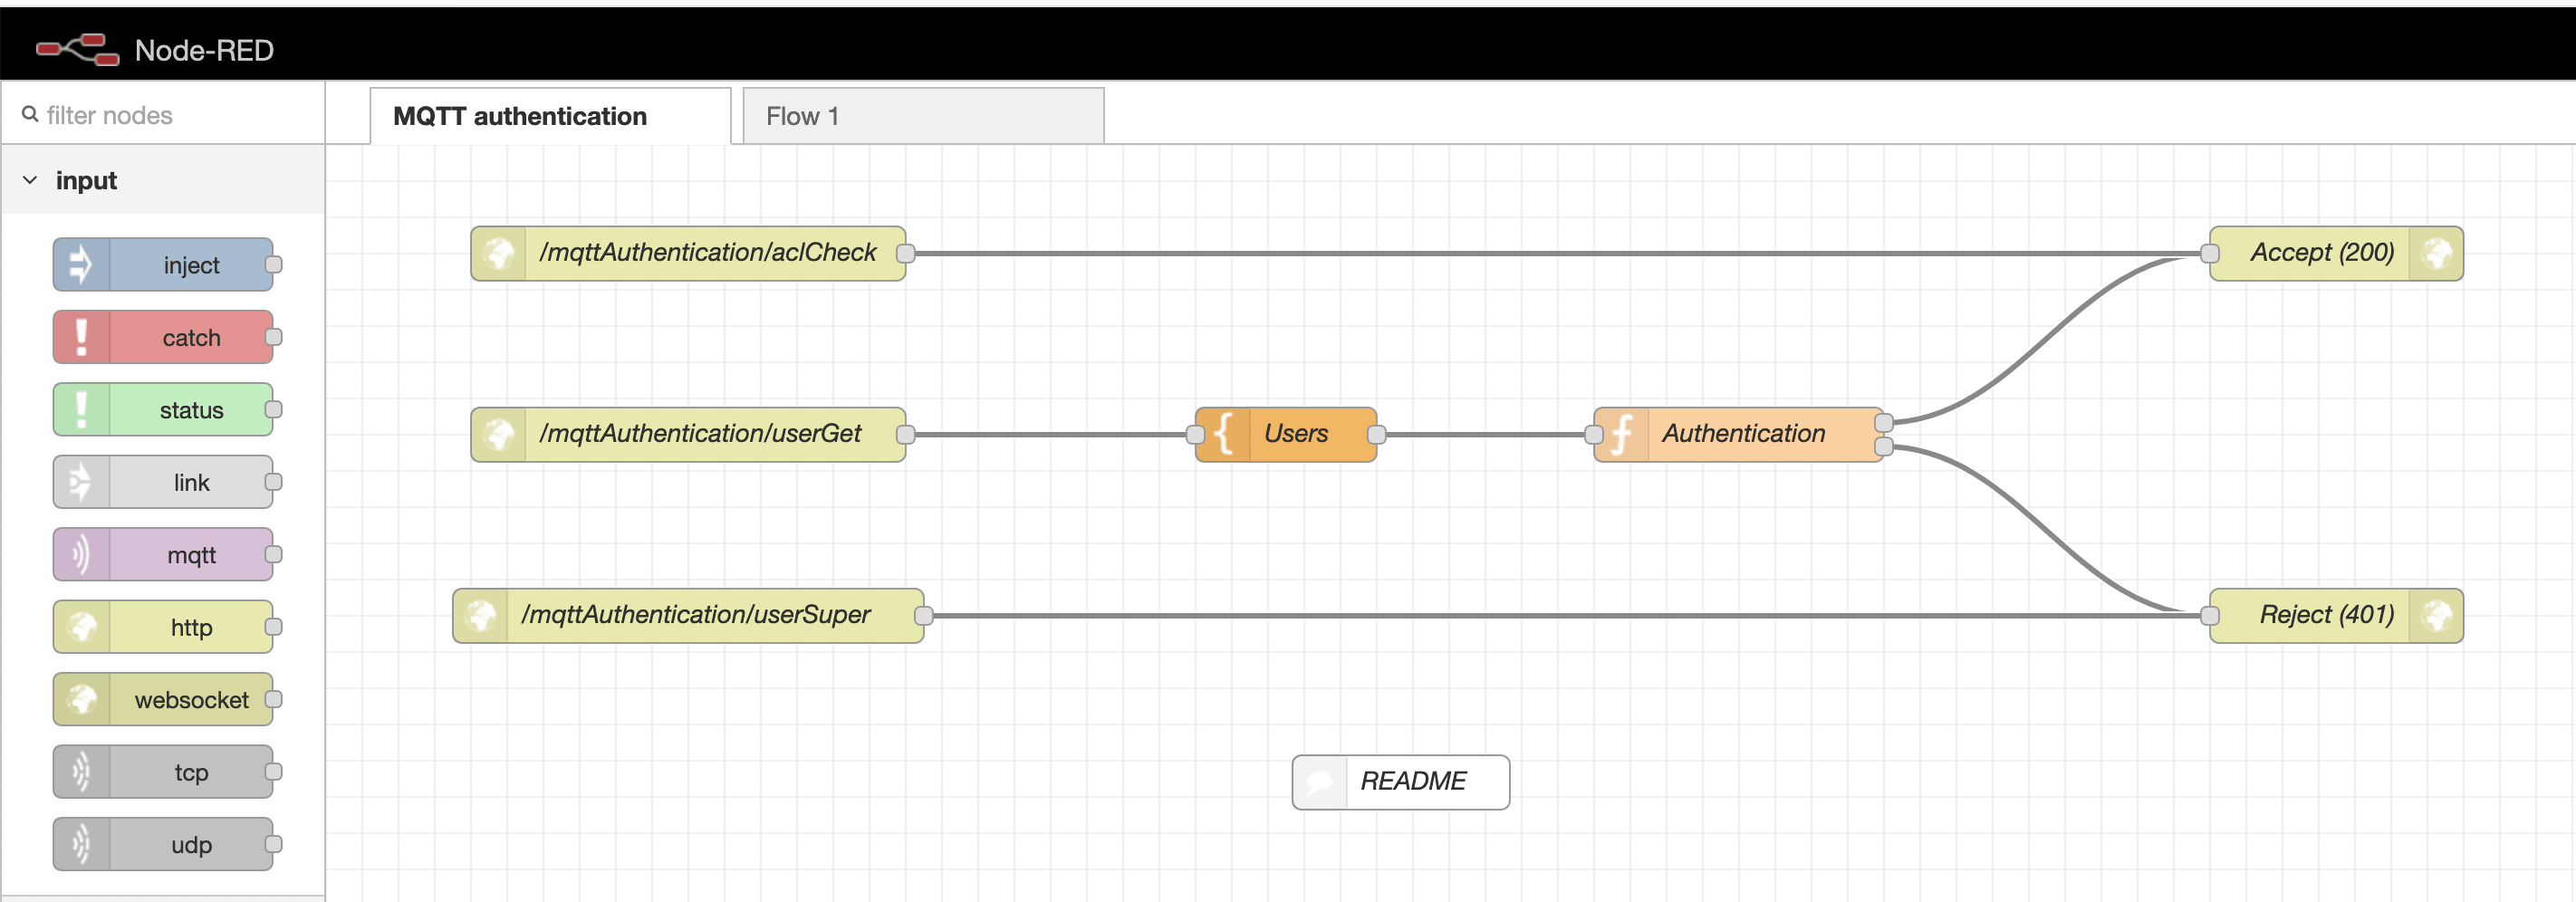 MQTT authentication flow
Within this authentication flow, look for the Users template node. This node contains an array where you can define credentials for each user. You can add as many users as your project requires.
Note: The
node-reduser is essential for Node-RED to connect to the MQTT server. Be sure not to remove this user from your configuration.
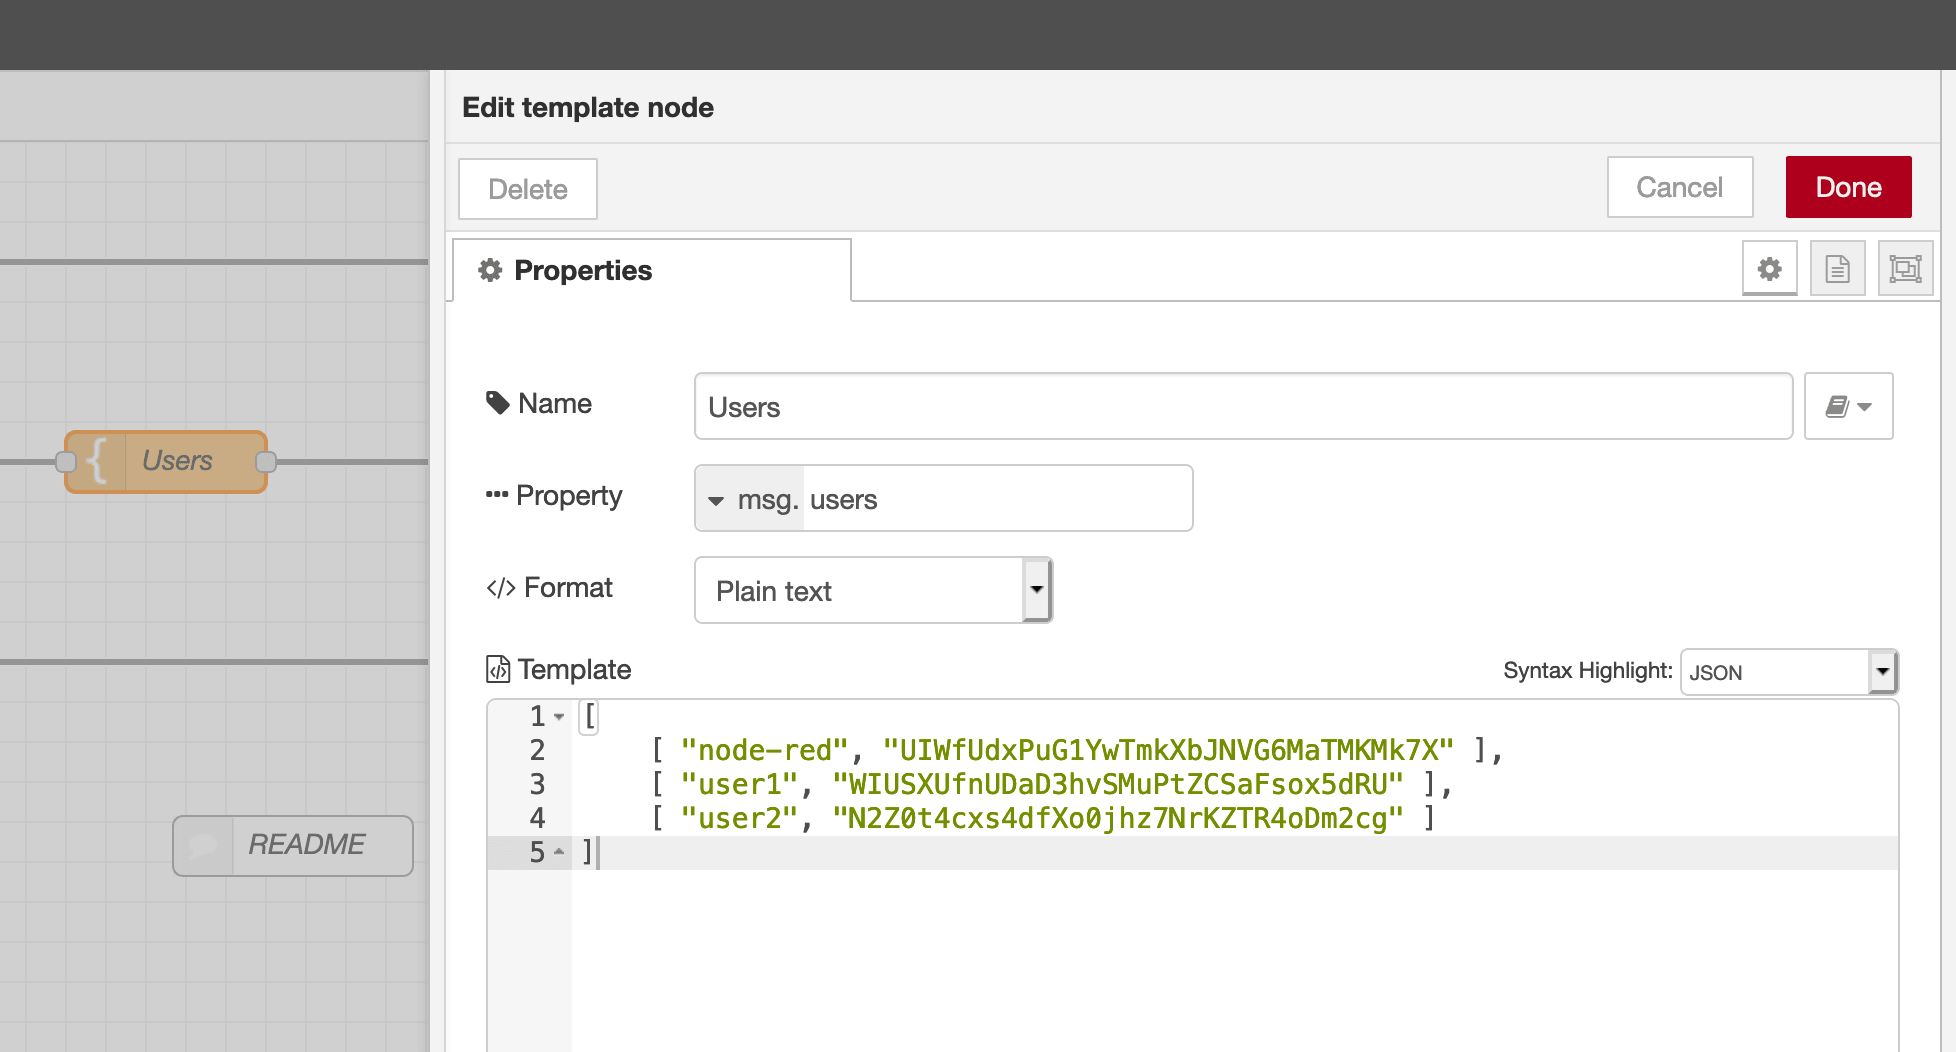 MQTT users node
Connecting to MQTT via WebSockets
You have the option to connect to the Mosquitto MQTT server either via the MQTT protocol or using WebSockets.
While the MQTT protocol is lightweight and particularly well-suited to IoT devices, it is not natively supported by web browsers. If you wish to interact with your MQTT server from a browser, it is recommended to use WebSockets. This method encapsulates MQTT traffic within the WebSocket protocol and works seamlessly with Stackhero's services.
To enable WebSocket connectivity, simply activate the "WebSocket Support" option in your Stackhero dashboard. Once enabled, configure your client to use the WebSocket URL: wss://<XXXXXX>.stackhero-network.com:443/mqtt. Remember to replace the default mqtts://<XXXXXX>.stackhero-network.com with this WebSocket URL for browser-based connections.
Choosing an MQTT library
For development, the "MQTT.js" library is particularly recommended. It is a robust JavaScript library compatible with both Node.js and browser environments. You can find more information in its official repository.
Example: connecting from a browser to MQTT via WebSockets
For a practical example of connecting from a browser to the MQTT server using WebSockets, you can refer to this repository: https://github.com/stackhero-io/mqttWebSocketGettingStarted. Feel free to modify the src/index.html file with your server's url, username, and password to suit your configuration.
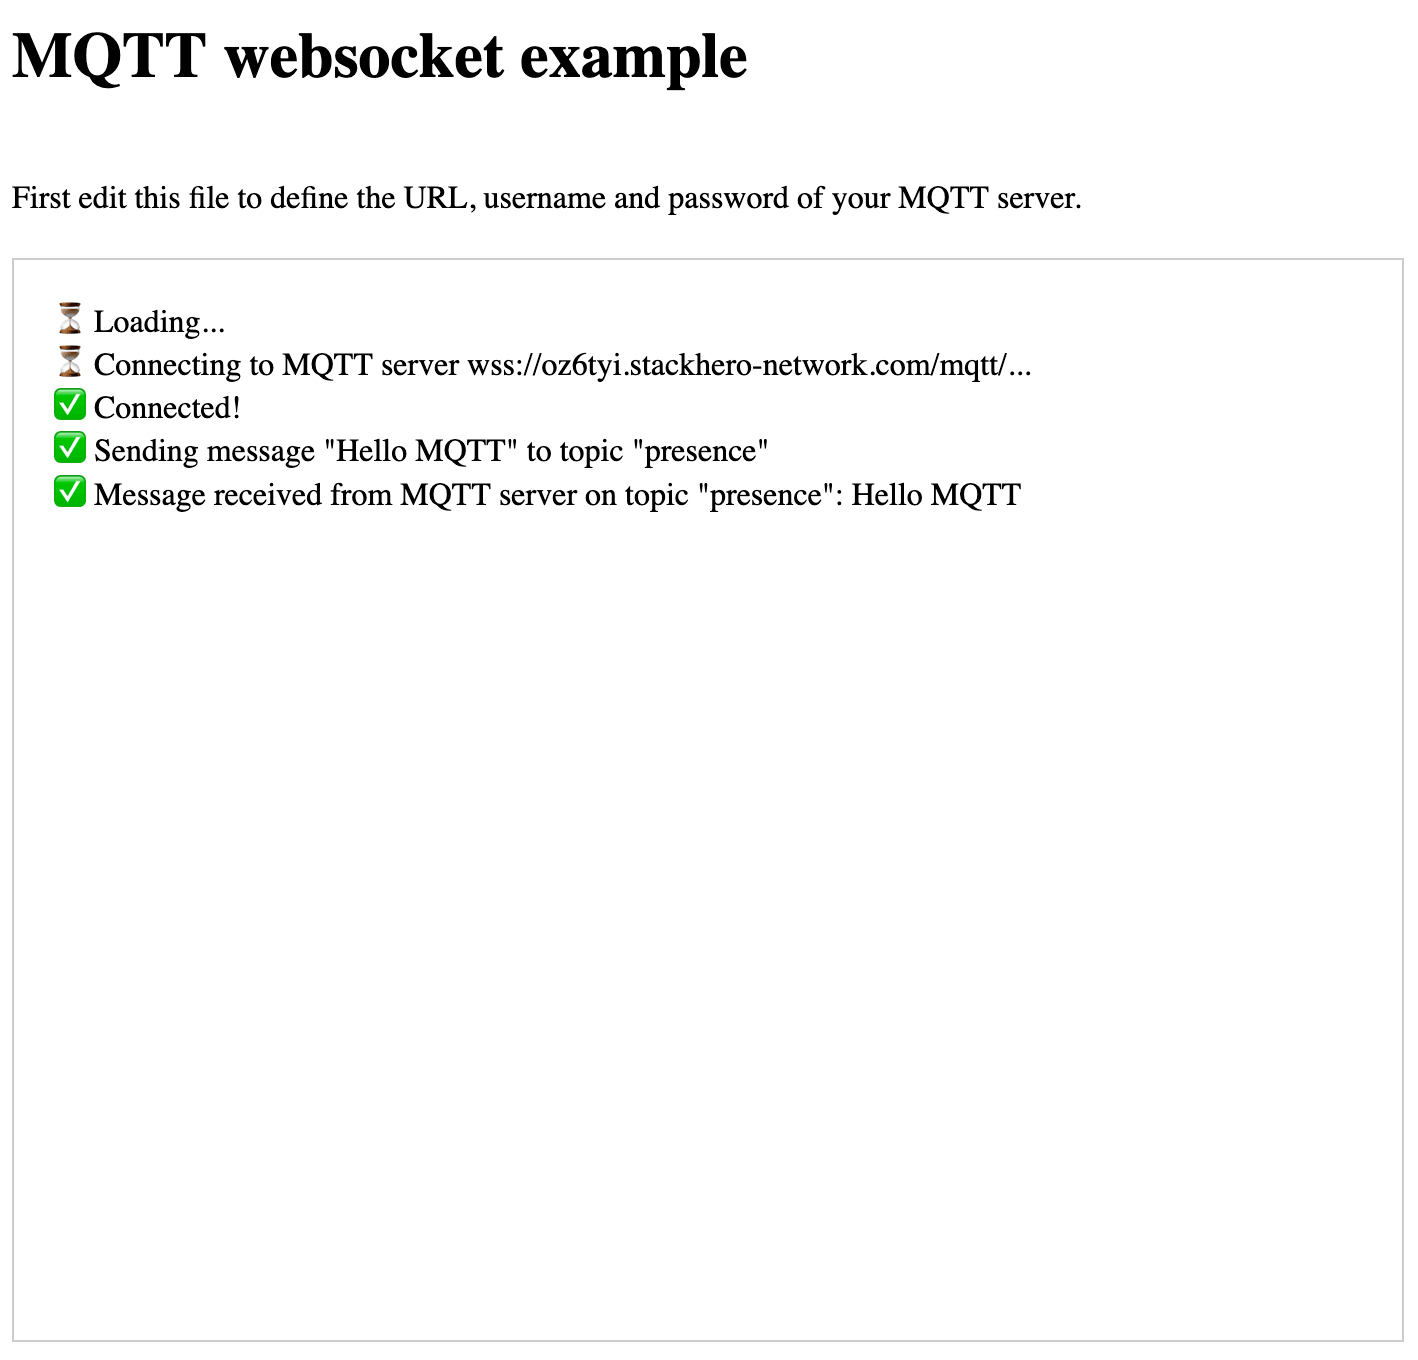 MQTT WebSocket example
Before testing this setup, ensure that WebSocket support is enabled in your Stackhero dashboard. This will guarantee smooth operation for browser-based connections.