 Python: Configuring your "Stackhero for Python" service
This documentation is part of the Deploy to production guide. You can view the complete guide here: How to deploy your Python code to production in just a few minutes.
👋 Welcome to the Stackhero documentation!
Stackhero offers a ready-to-use Python cloud solution that provides a host of benefits, including:
- Deploy your application in seconds with a simple
git push.- Use your own domain name and benefit from the automatic configuration of HTTPS certificates for enhanced security.
- Enjoy peace of mind with automatic backups, one-click updates, and straightforward, transparent, and predictable pricing.
- Get optimal performance and robust security thanks to a private and dedicated VM.
Save time and simplify your life: it only takes 5 minutes to try Stackhero's Python cloud hosting solution!
If you have not yet started a Stackhero for Python service, you can create one from your Stackhero dashboard. This usually only takes a few minutes.
Once your Python service is up and running, you will need to add your SSH public key to its configuration. To display your public key, run:
cat ~/.ssh/id_*.pub
Do you not have SSH keys yet?
You can generate them with:
ssh-keygen -t ed25519
To add your public key to your Python service:
- Open the Stackhero dashboard and select your Python service.
- Click the "Configure" button.
- Paste your SSH public key into the "SSH public keys" section.
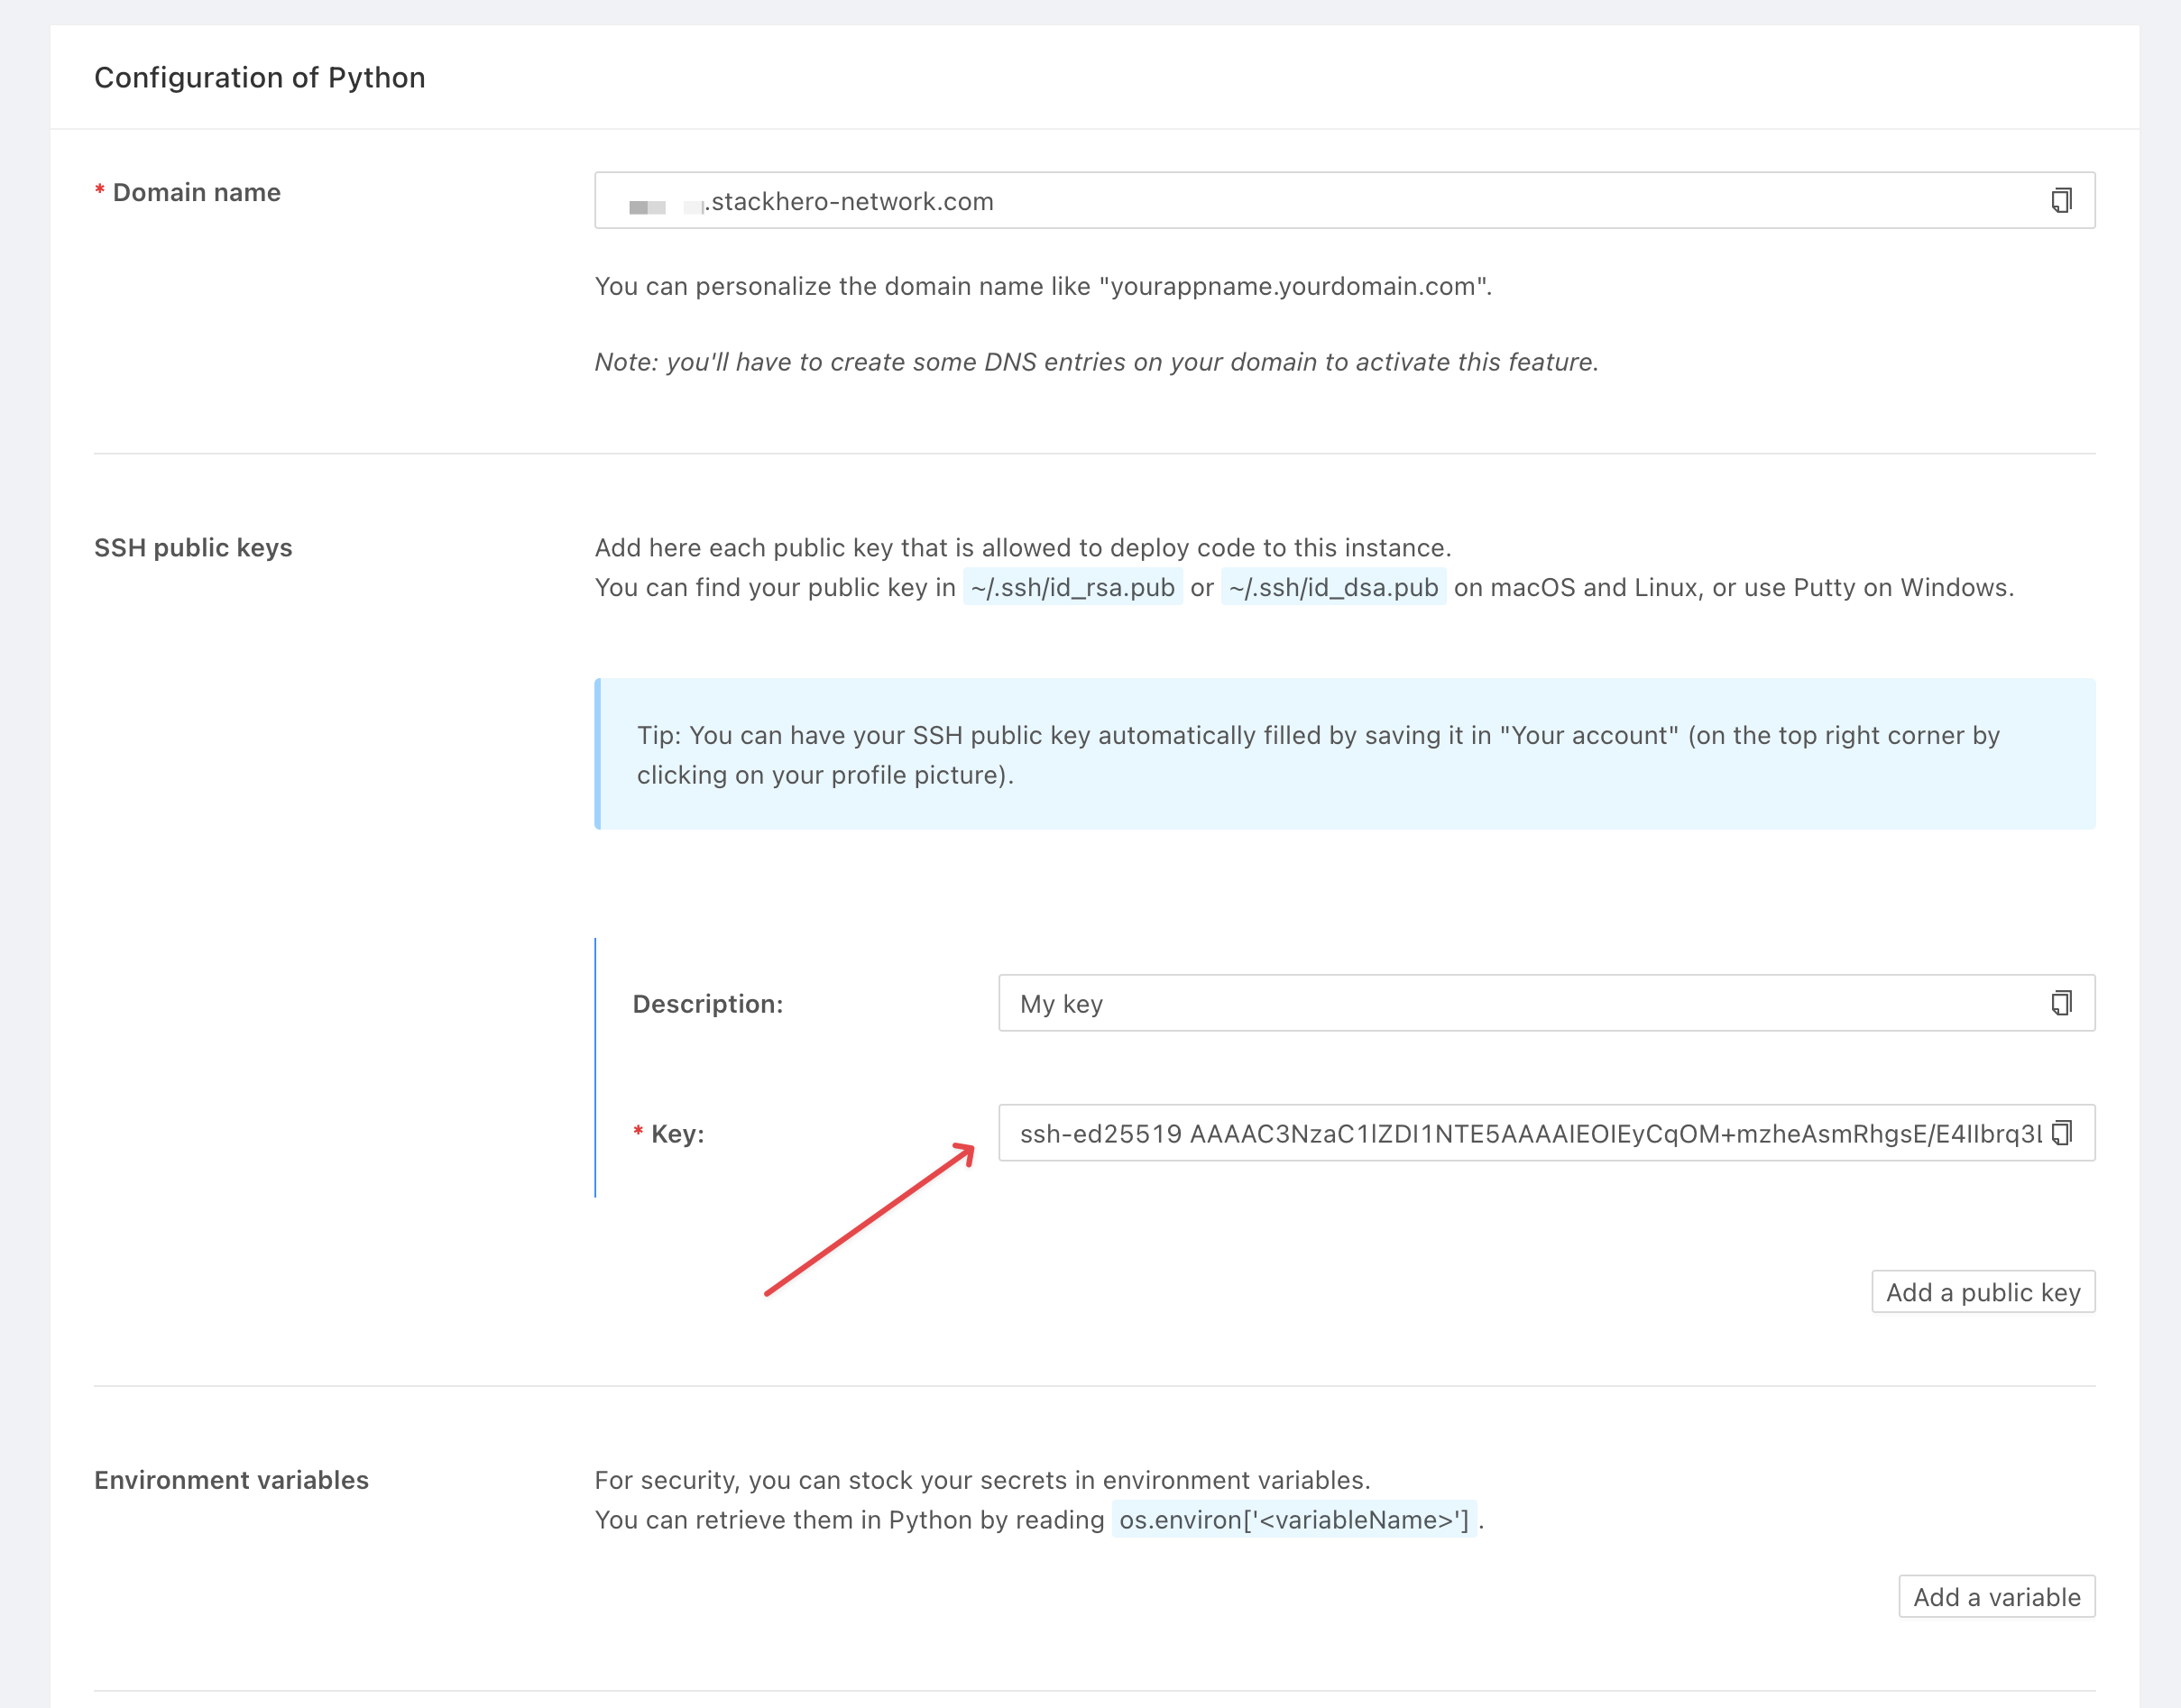 Example of a Python service configuration
Tip: You can also set your SSH public key globally so that any new services you create will automatically include it. To do this, go to your profile in the Stackhero dashboard, click your profile picture in the top right corner, select "Your profile", and add your SSH public key.