 Node-RED: Creating a public key
This documentation is part of the Handle projects guide. View the full guide here: How to use "Projects" in Node-RED.
👋 Welcome to the Stackhero documentation!
Stackhero offers a ready-to-use Node-RED cloud solution that provides a host of benefits, including:
- MQTT server included (Mosquitto).
- Full access to Node-RED admin UI.
- Node-RED Dashboard included.
- Unlimited and dedicated SMTP email server included.
- Effortless updates with just a click.
- Customizable domain name secured with HTTPS (for example, https://node-red.your-company.com).
- Optimal performance and robust security powered by a private and dedicated VM.
Save time and simplify your life: it only takes 5 minutes to try Stackhero's Node-RED cloud hosting solution!
To get started, log in to your Node-RED instance. Click the "hamburger" menu icon in the top-left corner, go to "Projects", and select "New".
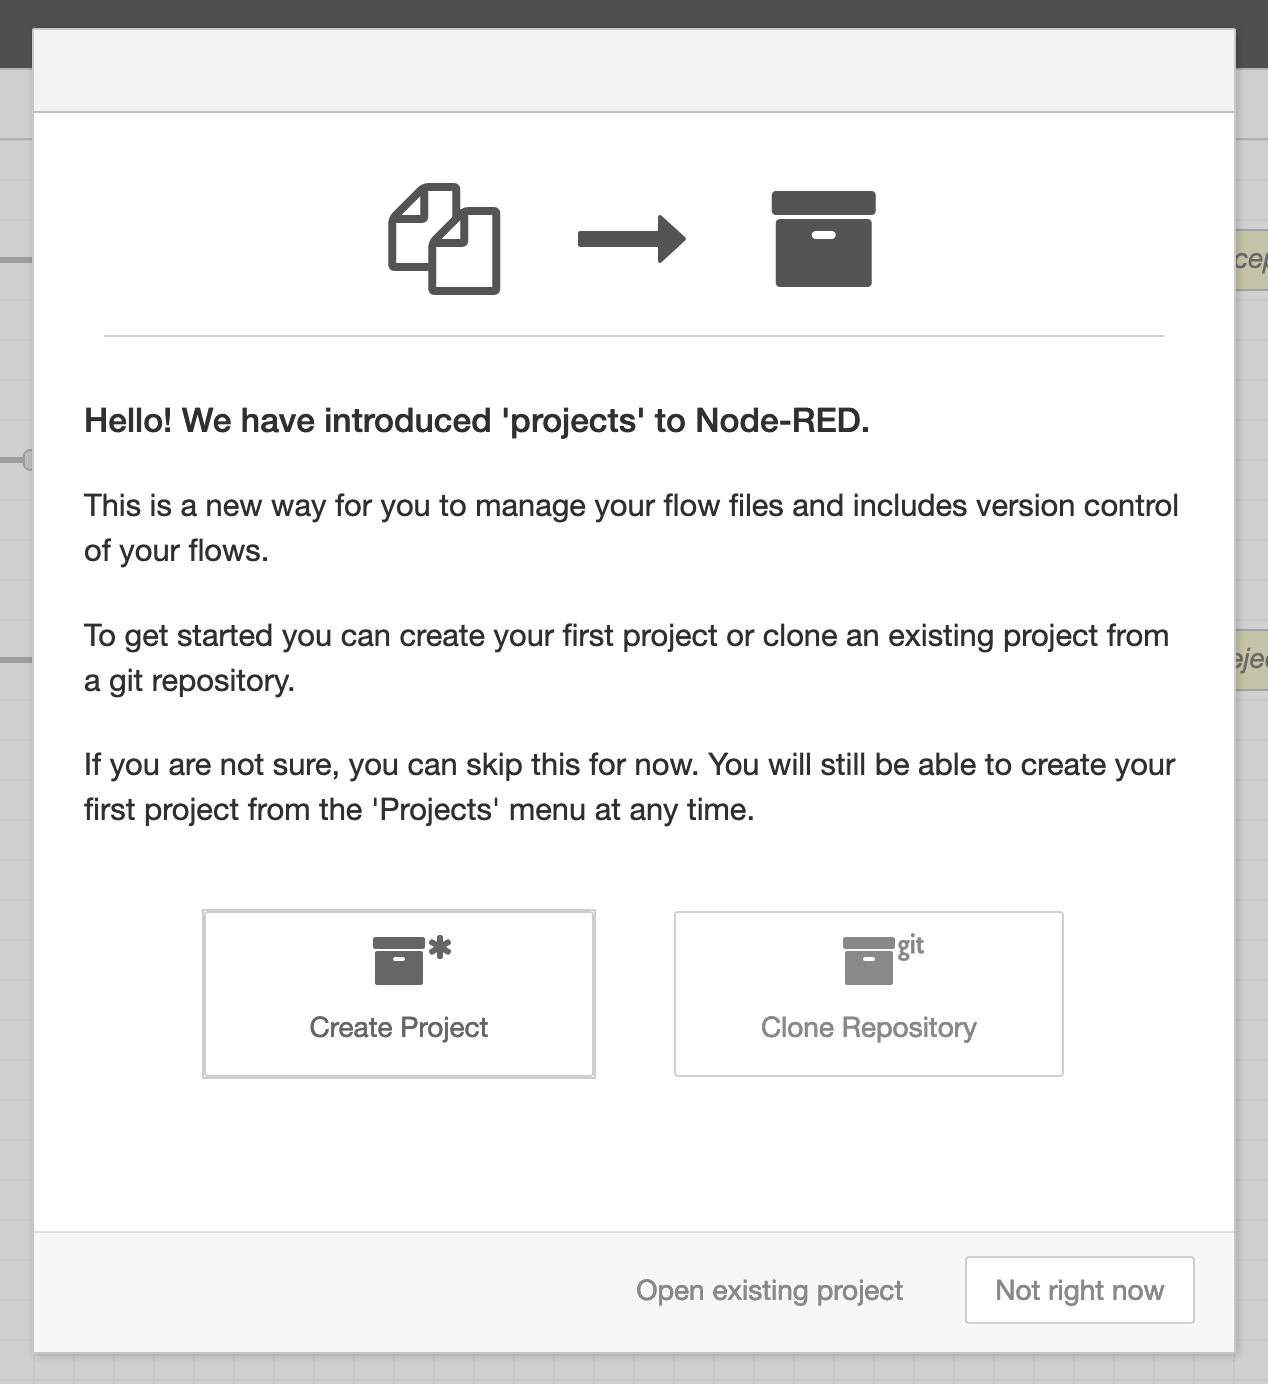 Welcome screen
Before you create or clone a project, you will need to generate a public key. Choose the Not right now option if prompted. Next, open the menu (the "hamburger" button in the top-right corner), navigate to Settings, and then head to the Git config section.
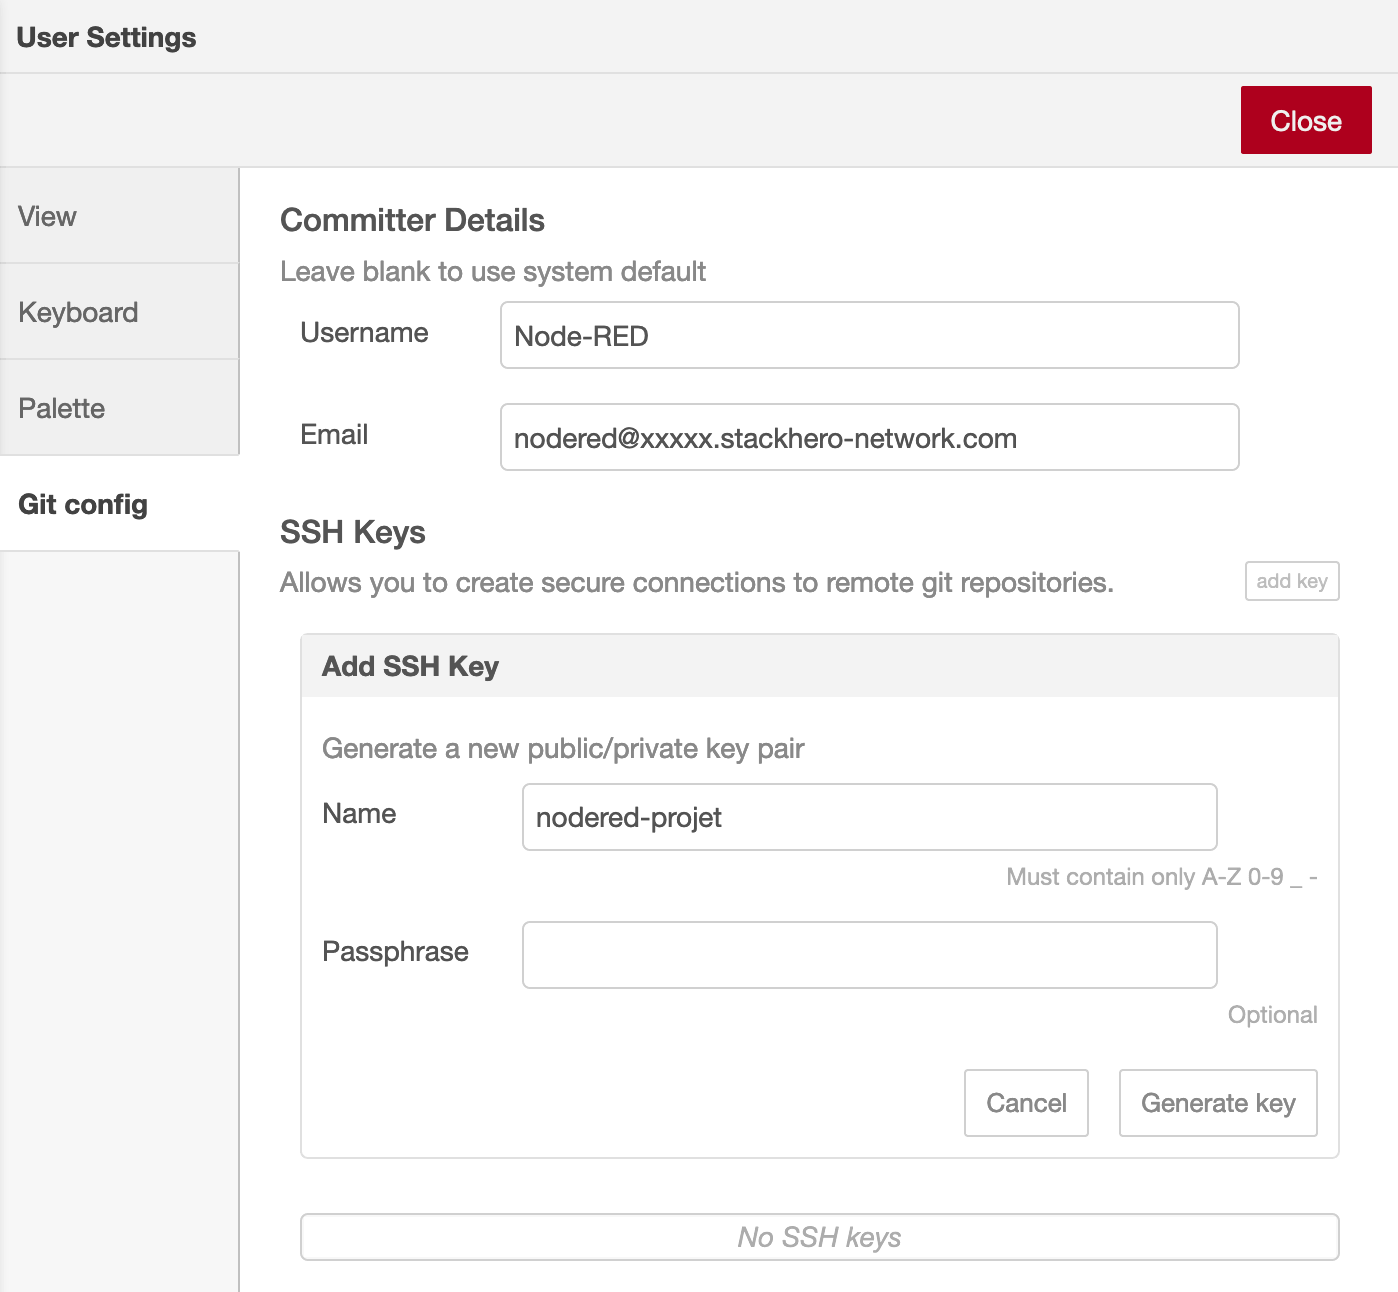
In the "Committer Details" area, enter your Git username and email address. These details help link your Git commits to your identity. For consistency, you might prefer setting the username as Node-RED and using an email like nodered@<XXXXXX>.stackhero-network.com.
 Git configuration panel
Once you are ready, click the Add key button, give your key a descriptive name, and then click Generate key. You can then use the Copy public key to clipboard option to copy the key before closing the panel.