 Python: Creating a REST API
Step-by-step guide to building a REST API with Flask in Python
👋 Welcome to the Stackhero documentation!
Stackhero provides a ready-to-use Python cloud solution designed to streamline your deployment process:
- Deploy your application to production in seconds with a simple
git push.- Use your own domain name, with automatic HTTPS certificate configuration for secure connections handled for you.
- Rely on automatic backups, one-click updates, and predictable pricing, so you can focus on your code, not infrastructure management.
- Benefit from strong performance and security on a private, dedicated infrastructure. Your environment is isolated and protected.
Save time and simplify your workflow: you can have your code running with Stackhero's Python cloud hosting in just 5 minutes.
This guide shows you how to create a simple REST API using Python and Flask. Flask is a lightweight micro-framework that makes it easy to build web applications and APIs quickly.
Prerequisites
Before getting started, make sure you have the following tools installed:
- Python
- pip
- git
- asdf
If you need help setting up your environment, see the Development platform guide. Alternatively, you can start coding instantly with the online Code-Hero platform. Code-Hero provides an online IDE and terminal, with all essential tools pre-installed. This lets you focus on your code instead of installation and setup.
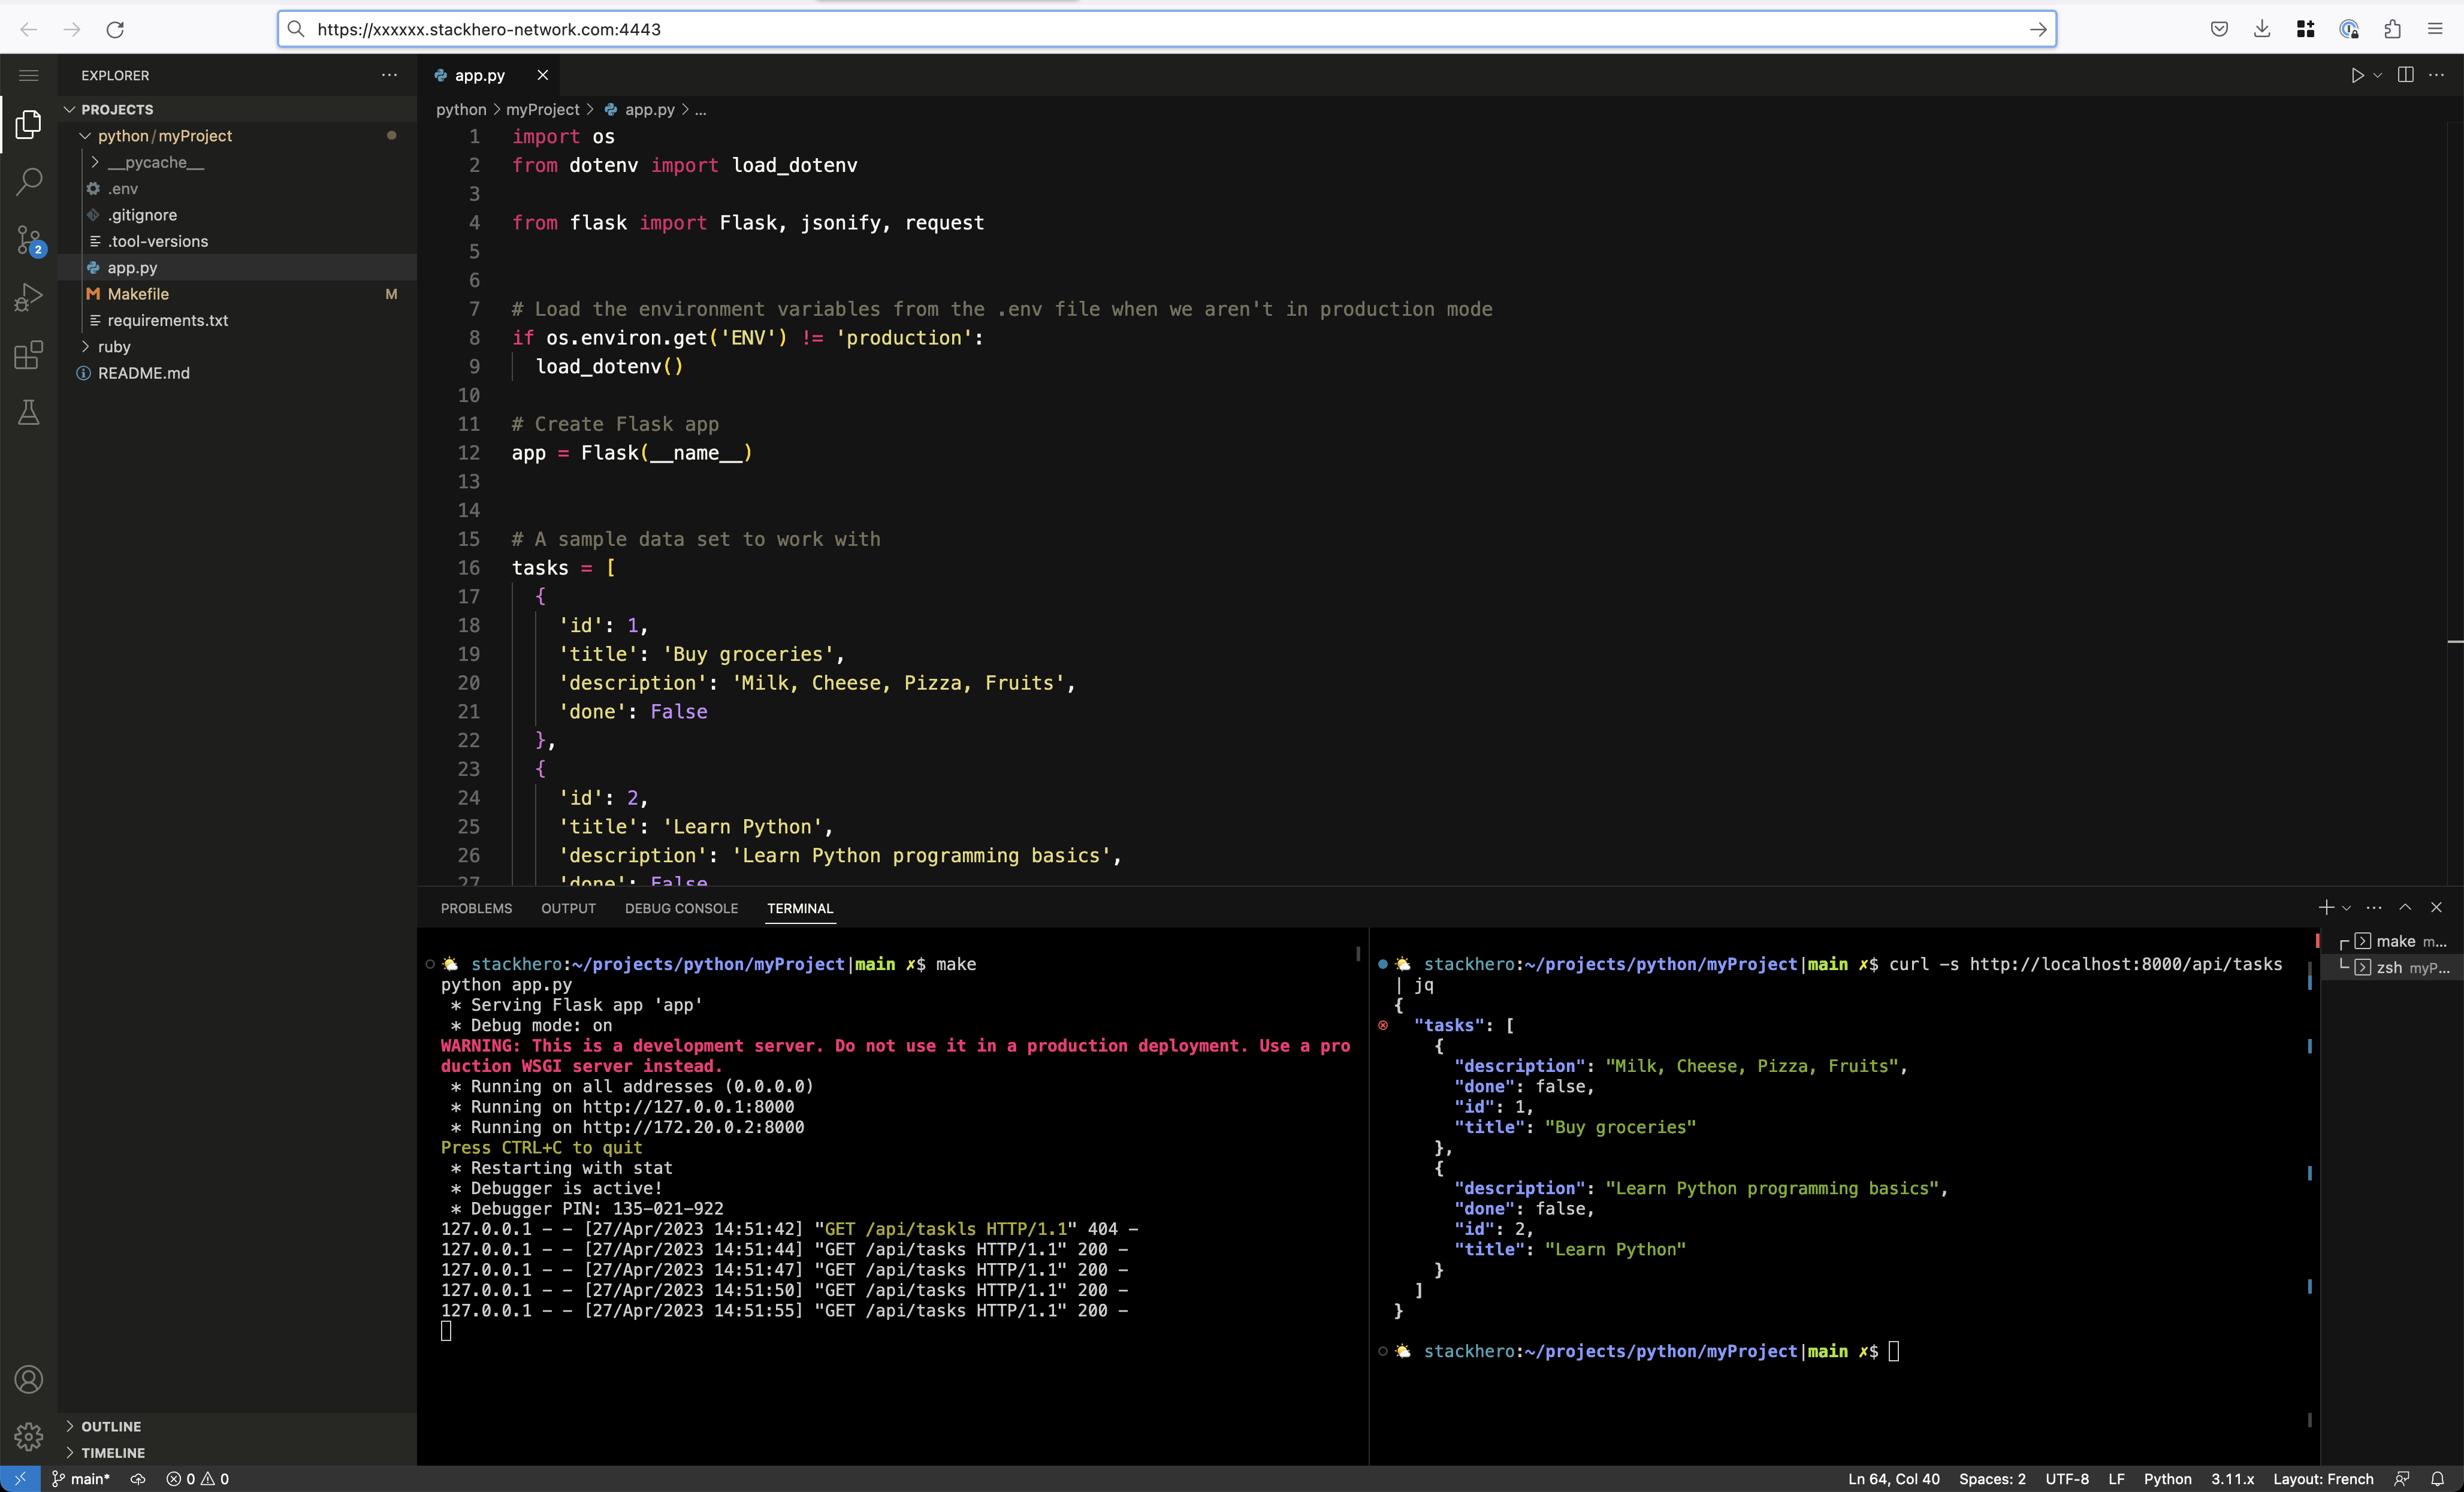 Python REST API running in Code-Hero, accessible directly from the browser
Creating a new project
Start by creating a new project directory. In this example, the project is called myRestApi:
mkdir myRestApi
cd myRestApi
Set the Python version to the latest available with asdf, and initialize a Git repository:
asdf install python latest \
  && asdf local python latest

echo "__pycache__/" >> .gitignore

git init
git add -A .
git commit -m "First commit"
Installing Flask dependency
You need one main dependency for this example: Flask.
Flask is designed to be simple and fast, so you can build and deploy web APIs without extra overhead. It includes built-in support for routing, templating, and HTTP request handling, which helps you move from idea to working API in minutes.
You can install Flask and python-dotenv using pip:
pip install Flask python-dotenv
We include
python-dotenvto manage environment variables securely and conveniently. You will see its use in later steps.
After installing, freeze your dependencies to a requirements.txt file:
pip freeze > requirements.txt
Freezing dependencies ensures everyone uses the same package versions. This small step can save hours of troubleshooting later.
Implementing the REST API using Flask
Now you are ready to write your API code.
Create a file named app.py and add this code:
import os
from dotenv import load_dotenv
from flask import Flask, jsonify, request

# Load environment variables from .env for non-production environments
if os.environ.get('ENV') != 'production':
    load_dotenv()

app = Flask(__name__)

# Example tasks data
tasks = [
    {
        'id': 1,
        'title': 'Buy groceries',
        'description': 'Milk, Cheese, Pizza, Fruits',
        'done': False
    },
    {
        'id': 2,
        'title': 'Learn Python',
        'description': 'Learn Python programming basics',
        'done': False
    }
]

@app.route('/api/tasks', methods=['GET'])
def get_tasks():
    return jsonify({'tasks': tasks})

@app.route('/api/tasks/<int:task_id>', methods=['GET'])
def get_task(task_id):
    task = [task for task in tasks if task['id'] == task_id]
    if not task:
        return jsonify({'error': 'Task not found'}), 404
    return jsonify({'task': task[0]})

@app.route('/api/tasks', methods=['POST'])
def create_task():
    if not request.json or 'title' not in request.json:
        return jsonify({'error': 'Title is required'}), 400
    task = {
        'id': tasks[-1]['id'] + 1,
        'title': request.json['title'],
        'description': request.json.get('description', ""),
        'done': False
    }
    tasks.append(task)
    return jsonify({'task': task}), 201

if __name__ == '__main__':
    if os.environ.get('ENV') == 'production':
        app.run()
    else:
        app.run(host='0.0.0.0', port=8080, debug=True)
You can start the server with:
python app.py
With
host='0.0.0.0', your API is accessible via your browser when using Code-Hero. Visithttp://<XXXXXX>.stackhero-network.com:8080/api/tasks, replacing<XXXXXX>with your Code-Hero domain.
Testing your REST API
Once the server is running, you can interact with your API using cURL. Here are some example commands:
-
Retrieve all tasks:
curl -s http://localhost:8080/api/tasks # Output: # { # "tasks": [ # ... # ] # } -
Retrieve a specific task (ID 2):
curl -s http://localhost:8080/api/tasks/2 # Output: # { # "task": { # ... # } # } -
Create a new task:
curl -s -X POST -H "Content-Type: application/json" \
-d '{"title": "New task", "description": "Created with cURL"}' \
http://localhost:8080/api/tasks
# Output:
# {
#   "task": {
#     ...
#   }
# }
Tip: For cleaner output, you can pipe the result to
jq. For example,curl -s http://localhost:8080/api/tasks/2 | jqmakes the JSON easier to read.
 Example of Python REST API using Flask, running in Stackhero Code-Hero, with the server (1) and the client using cURL (2)
Handling environment variables
Environment variables help you protect secrets like database credentials or API keys. Using them keeps sensitive data out of your codebase and Git history, and makes it easy to use different settings for each environment.
To manage environment variables, you can use the python-dotenv module. If you skipped the earlier install step, you can install it now:
pip install python-dotenv
pip freeze > requirements.txt
Create a .env file at your project root and add your development environment variables:
ENV="development"
DATABASE_PASSWORD="secretPassword"
THIRD_API_PRIVATE_KEY="secretKey"
Add .env to your .gitignore so it is not committed to Git:
echo ".env" >> .gitignore
You can access these variables in Python using os.environ.get():
import os

print(os.environ.get('ENV'))
The
.envfile is for development only. For production or staging, you can set environment variables directly in your Stackhero dashboard under your Python service configuration.
Preparing Python and Flask for production deployment
Flask's built-in server is great for development. For production, you will want a robust WSGI server such as Gunicorn. Here is how you can prepare:
-
Install Gunicorn:
pip install gunicorn pip freeze > requirements.txt -
Start your app with Gunicorn:
ENV=production gunicorn app:app \
  --error-logfile - \
  -b 0.0.0.0:8080
Here,
app:apprefers to your file (app.py) and the Flask application instance (app). -
You can add a
Makefileto switch between development and production modes easily:.DEFAULT_GOAL := dev # Stackhero for Python runs the "run" rule by default. We override it to run 'prod'. run: prod prod: ENV=production gunicorn app:app \ --error-logfile - \ -b 0.0.0.0:8080 dev: python app.py
You can start the server in development mode with make dev (or just make), or in production mode with make prod.
Deploying your Python code to production
Stackhero makes cloud deployment simple and secure. You can deploy your Python project using the Python cloud hosting service. Features include:
- Deployment with a single
git push - Automatic TLS (HTTPS) with customizable domains
- Dedicated infrastructure for security
- Support for HTTP/2, TLS 1.3, WebSockets, GZIP & Brotli, ETag, and both TCP/UDP port access
Configuring the "Stackhero for Python" service
To deploy, follow these steps:
-
Get your public SSH key:
cat ~/.ssh/id_*.pub -
In the Stackhero dashboard, open your "Stackhero for Python" service and select "Configure".
-
Paste your public key in the "SSH public keys" or "Key" field.
-
Click "Validate" to confirm your configuration.
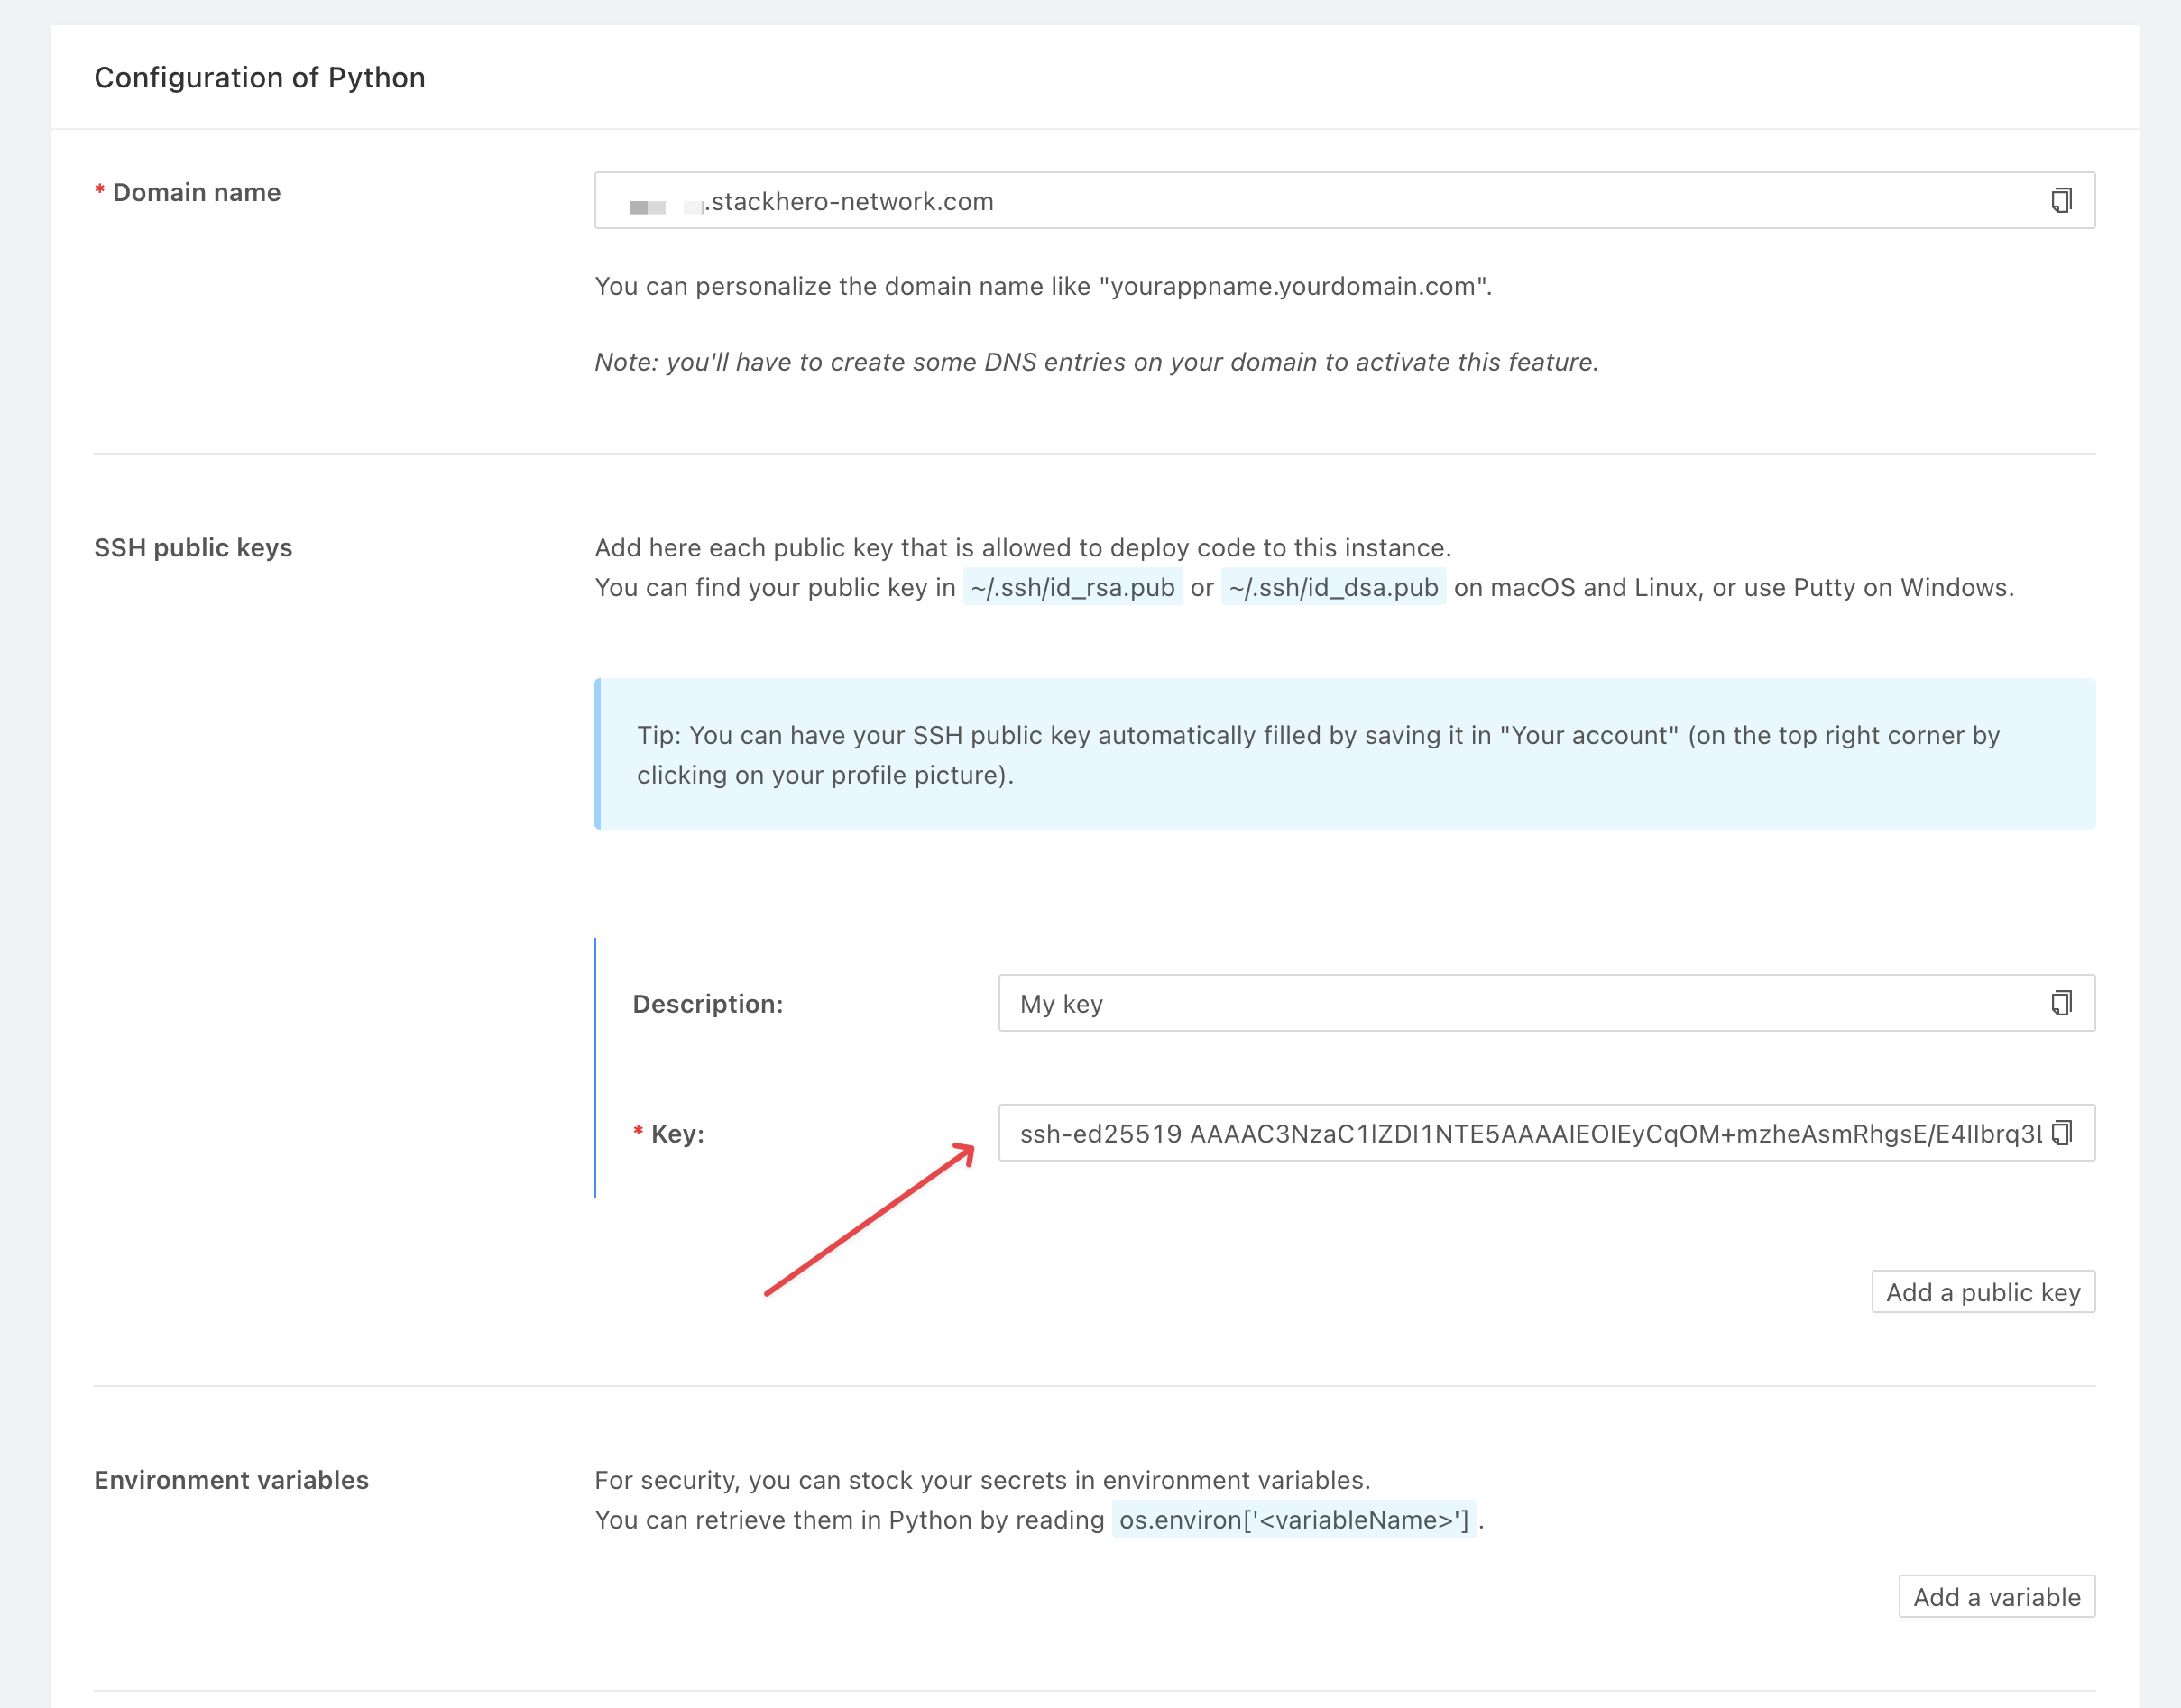 "Stackhero for Python" public key configuration
If you do not have SSH keys yet, you can generate them with:
ssh-keygen -t ed25519
Add a Git remote to your project using the command provided in your Stackhero service (replace <XXXXXX> with your service domain):
git remote add stackhero ssh://stackhero@<XXXXXX>.stackhero-network.com:222/project.git
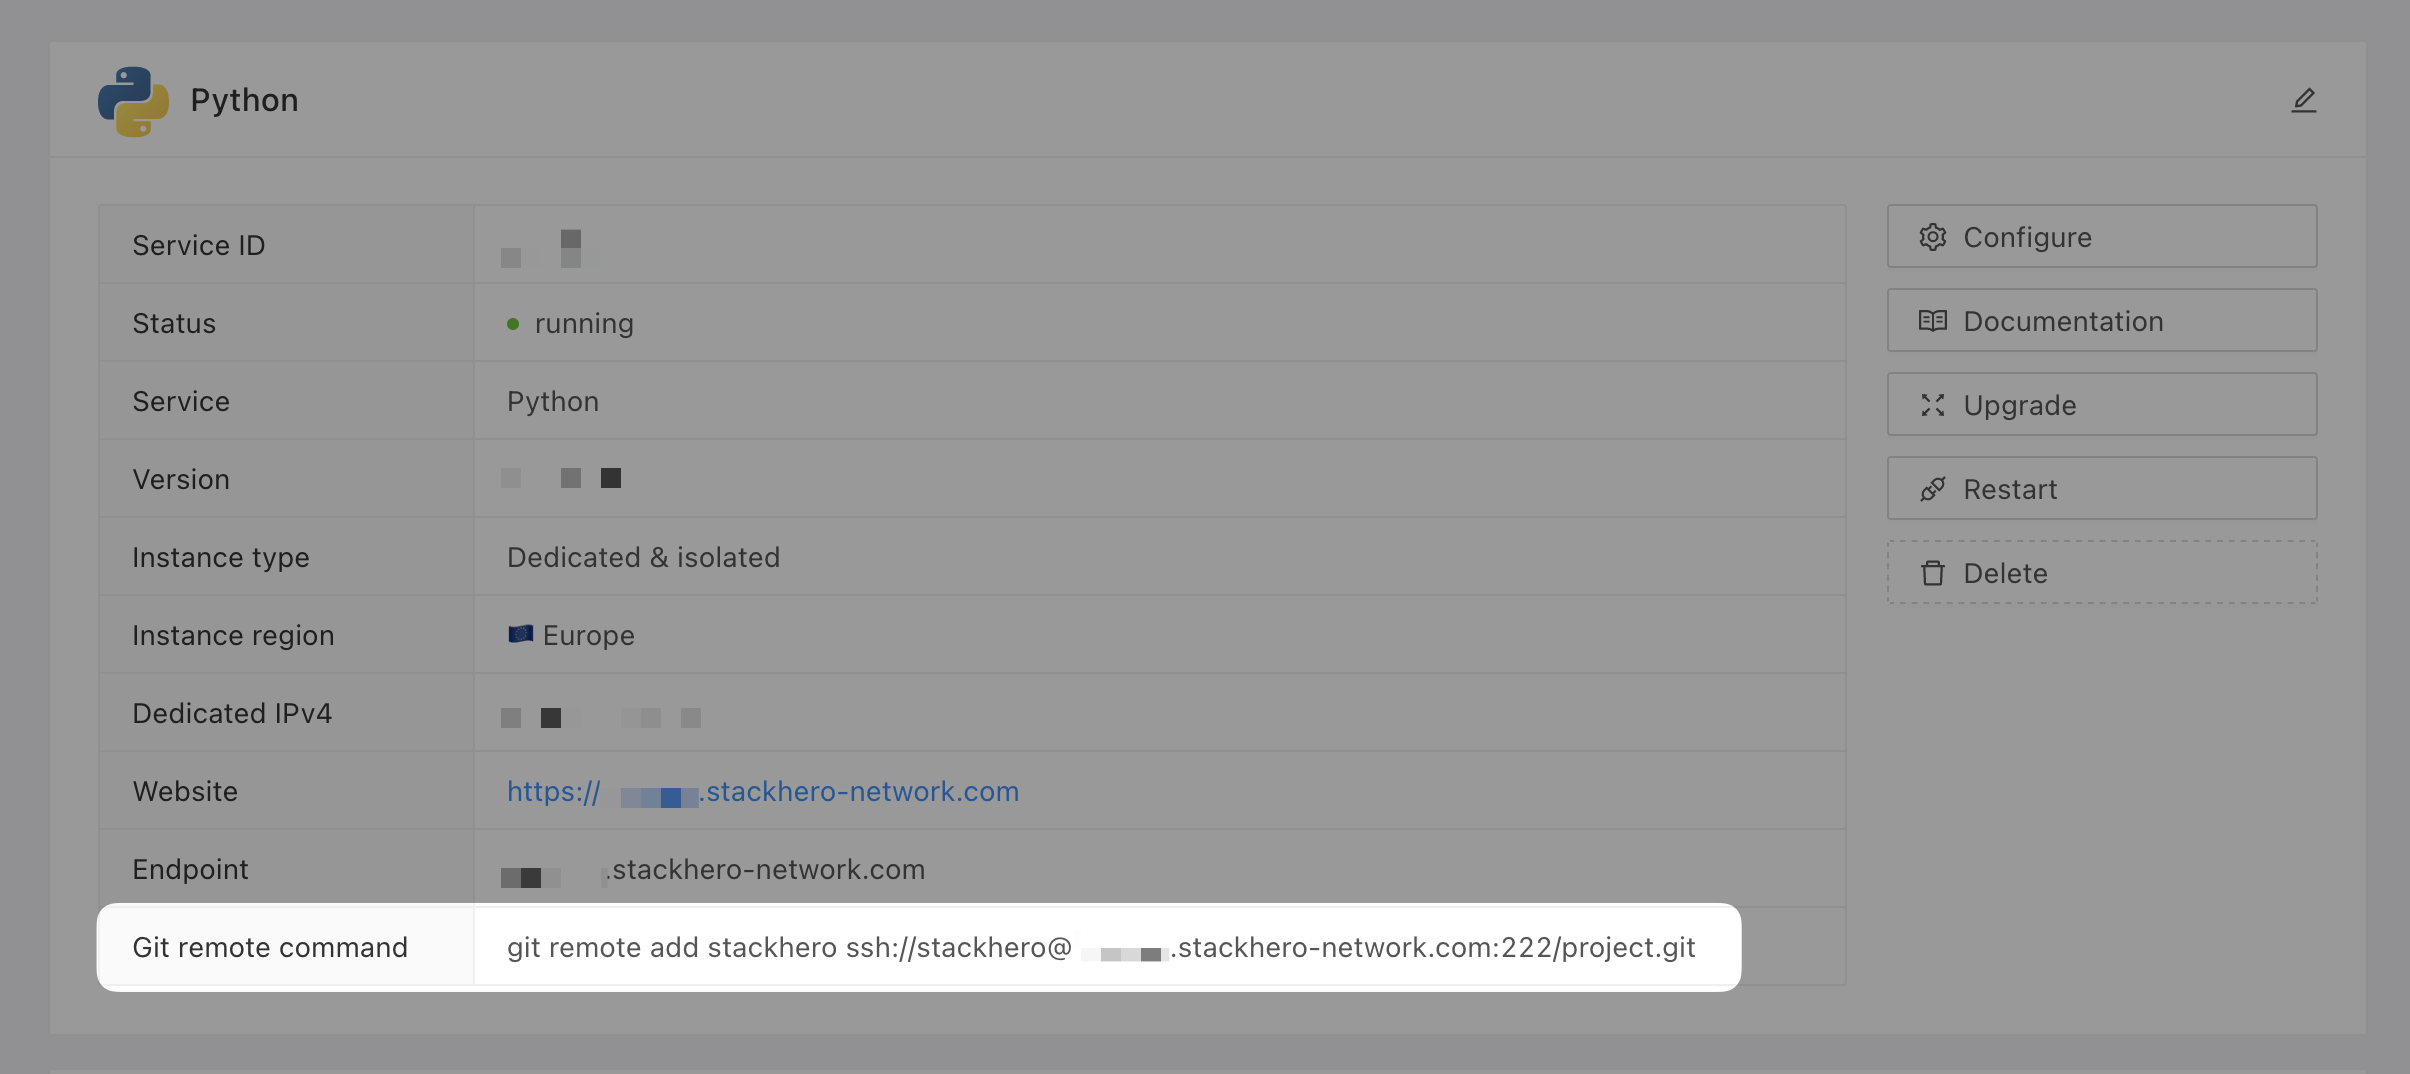 Git remote command
Deploying to production
When you are ready to deploy, push your code with:
git push stackhero main
Remember to commit your changes before deploying. In Stackhero Code-Hero, you can use the Command Palette (
Ctrl+Shift+PorCmd+Shift+P) and typeGit: Commitfor quick commits.
After deployment, your API is live at https://<XXXXXX>.stackhero-network.com/api/tasks. Replace <XXXXXX> with your service domain to access your Flask API.
Conclusion
You now have a working REST API built with Flask. With this foundation, it is straightforward to expand your application, connect to databases, or integrate with other services. Flask gives you the flexibility to grow from a simple prototype to a full-featured production API.